Concoa 537 Series Manual de Instruções de Instalação e Operação - Página 8
Procurar online ou descarregar pdf Manual de Instruções de Instalação e Operação para Interruptor Concoa 537 Series. Concoa 537 Series 20 páginas. Autoswitch systems
Também para Concoa 537 Series: Manual de instruções de instalação e funcionamento (17 páginas)
POWER CORD
Check the input voltage configuration of the remote alarm by looking at the nameplate on the side of the remote
alarm enclosure. Do not connect the remote alarm to voltages higher or lower than those listed on the nameplate.
Units configured for 110 VAC , having a 3-prong plug, should be connected to a grounded receptical. The 220/240
VAC remote alarms have three stripped wires instead of a plug. Check the nameplate to confirm that remote alarm
is intended for 220/240 VAC operation. When connecting to 220/240 VAC, use the following wire configurations:
green wire
=
black wire
=
white wire
=
Once the power cord is connected to the power source, move the power switch to the up position. The red power
LED should illuminate.
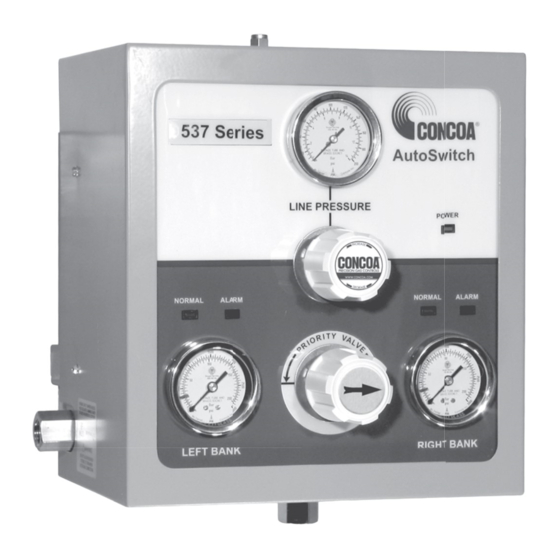
INSTALLATION
CONNECTING THE AUTOSWITCH TO THE 529 5298
AND 529 5300 REMOTE ALARM
The following components are required to hookup the remote alarm to the autoswitch:
529 5298 or 529 5300 remote alarm
529 54XX or 529 55XX switchover system
830 9004-6 connector as shown below
soldering iron (customer supplied)
solder (customer supplied)
small flat-tip screwdriver (customer supplied)
cable (customer supplied) Note: 22 gauge wire is recommended. Cable should contain four wires. To make a water
resistant connection to the autoswitch, a round cable with outside diameter .195" - .265" must be used.
The terminal view of the 529 5298 & 529 5300 remote alarm will look like the diagram shown below. The connec-
tions to the autoswitch will use the labeled terminal blocks shown in the diagram.
Figure 5. 529 5298 and 529 5300 remote alarm terminals
8
ground
power
power