Alderon Industries VersAlarm 4X Manual de operação, manutenção e instalação - Página 6
Procurar online ou descarregar pdf Manual de operação, manutenção e instalação para Sistema de segurança Alderon Industries VersAlarm 4X. Alderon Industries VersAlarm 4X 6 páginas. 2-zone outdoor
Também para Alderon Industries VersAlarm 4X: Manual de operação, manutenção e instalação (3 páginas)

VersAlarm
2-Zone | Outdoor Alarm System, Type 4X
Operation, Maintenance and Installation Manual
Factory Settings and Functions
The VersAlarm™ 4X comes standard from the factory with the settings listed in this section. Review the operation and
settings information below, reference when required to disable LEDs or for troubleshooting purposes.
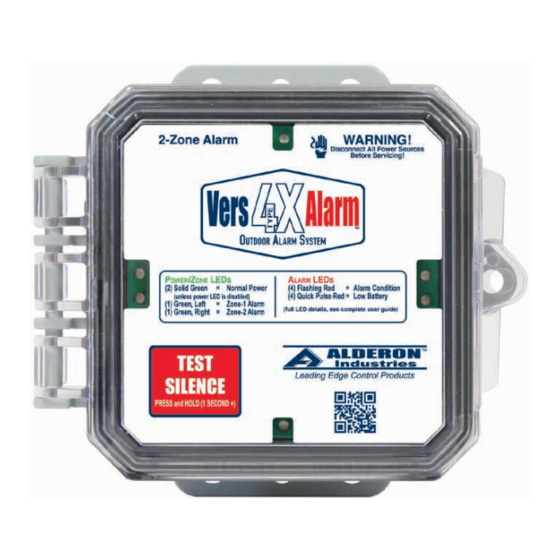
1. When powered, the green LEDs (Fig. 8; bottom/middle) will illuminate (solid) to indicate the alarm is powered. The power
LEDs are factory set to be on (solid) and will pulse when disabling this feature.
2. The red alarm LEDs (Fig. 9; top/bottom/left/right) will illuminate during a liquid level alarm condition (flashing) for zone-1
and/or zone-2 and for a low battery alarm at 7.8 volts or improper battery installation (quick pulse).
3. Green Power On LED Indicators:
a. Factory set to "on" (illuminate/solid).
b. Disable by pressing and holding the test/silence capacitive touch button for approximately 8-seconds, the green
LEDs will pulse three times and the green power LED indicators will turn off. Repeat this process to turn them
back on.
4. Red Low Battery Alarm LED Indicators:
a. The low battery alarm LEDs are factory set to "off" (disabled). The alarm panel will automatically enable the low
battery alarm the first time a battery is connected. The battery must be inserted for approximately one-minute for
the auto-enable feature to activate, then the green LEDs will pulse four times to indicate that the low battery alarm
is enabled.
Note: The low battery alarm feature is automatically enabled only after a battery is connected for the first time. The alarm feature must then be manually
enabled or disabled.
c. Disable low battery alarm LEDs by pressing and holding the test/silence capacitive touch button for approximately
16-seconds, the green LEDs will quick pulse five times to indicate the low battery alarm has been disabled.
d. Enable low battery alarm LEDs by pressing and holding the test/silence capacitive touch button for approximately
16-seconds, the green LEDs will quick pulse five times and then the green LEDs will pulse five times upon release
of the button to indicate the low battery alarm has been enabled.
Note: When the system is running on battery backup power and the low battery alarm is disabled, the low battery alarm will temporarily re-activate to
indicate when the battery is about to lose its charge. The settings will return to the last programmed state upon full power being restored.
Note: The LED settings cannot be changed while the system is running on battery backup power.
Alarm Systems
Control Panels
Alderon Industries - Hawley, MN | 218.483.3034 | [email protected] | alderonind.com
4X
™
(Fig. 8)
Float Switches
Leak Detection Systems
(Fig. 9)
P/N: QSG00307_Rev01
Page 6 of 6
