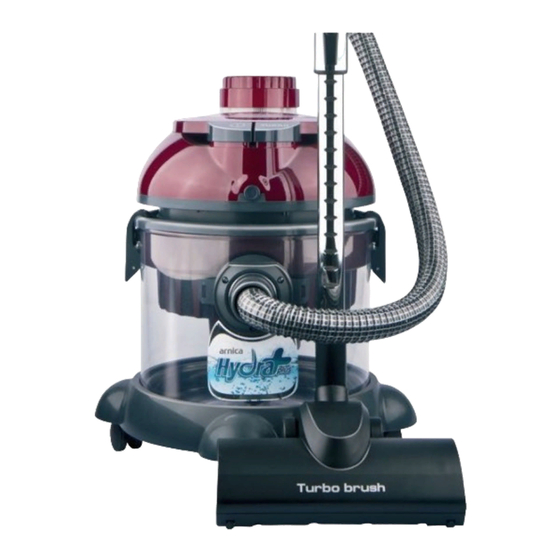
Arnica HydraRain Pro Manual - Página 17
Procurar online ou descarregar pdf Manual para Aspirador de pó Arnica HydraRain Pro. Arnica HydraRain Pro 20 páginas.

4. USE
For effective cleaning, please use the accessories as follows:
•
For carpets, rugs and hard floors, use the combination nozzle B4
with suction hose B3 and suction tube B1.
•
To avoid dust, crumbs etc. from radiators, drawers, cars etc., use
the crevice nozzle B5 to vacuum narrow spaces. Earth, shaving,
crumbs, hair, etc. are sucked up directly with the suction pipe B1
itself.
INSTALLATION FOR DRY SUCTIONS
•
Place rubber caps B2 on the two lower openings on seperator A2
(Fig.8)
•
Fill approx. 2 liters of cold tap water up to the mark on the
suction nozzle into the dirt collecting container A3 (Fig. 9)
•
Place the separator A2 in the dirt container A3. Make sure that
the oval cutout fits correctly. This must be directly above the
suction nozzle (see Fig. 6).
•
Place the motor unit A1 with the buttons directly above the
suction nozzle on the separator A2.
•
Close the two side locks on the (see Fig. 4)
•
Now place the assembled dirt collecting container A3 in the fresh
water container A4. Now close the. Locks on the A5. chassis.
•
Select the. Accessories that. Are most suitable for the work
process. And connect them directly to the pistol grip or attach the
telescopic tube first and then connect the accessories.
•
Now insert the suction hose B3 into the opening of the dirt
collecting container A3 in front of the suction nozzle (Fig. 10)
•
Insert the plug of your vacuum cleaner into the socket and then
press the on/off button to turn your vacuum cleaner off (Fig. 11)
•
After you have finished the vacuuming process, press the on/off
button (Fig. 11) to turn off your vacuum cleaner.
•
After each vacuuming process, empty the dirty water container
A3 and clean it.
ASSEMBLY FOR WET CLEANING
•
Remove the rubber caps B2 from the two lower openings on the
separator A2 (Fig. 12) and place them on the two no-opening
sockets for storage.
•
Take the fresh water tank A4 out of the chassis A5 (Fig. 13).
•
Fill approx. 4 liters of cold tap water into the fresh water tank A4
up to the upper edge of the nozzle (Fig. 14). If necessary, fill in
warm water (up to 60°C).
•
Then place the fresh water tank. A4 on the chassis A5. (Fig. 13).
17
Make sure it is firmly seated.
•
Connect your suction hose B3 to your Hydra Rain (Fig. 15)
•
For wet floor cleaning, put the suction tube B1 together (Fig. 16)
and insert it into the handle of the suction hose. B3 (Fig.17)
•
Connect the fresh water connection hose to the motor unit A1
and the chassis A5 (Fig. 18).
•
Place the floor suction and spray nozzle B6 on the end of the
pipe. For hard floors with rubber lip B8 (Fig. 19), for. Carpets
slides out rubber lip B8 and put to one side (Fig. 20).
•
For wet cleaning upholstery, attach the upholstery spray and
suction nozzle B7 directly to the handle of the suction hose for
wet cleaning. B3.
•
For optimal and efficient wet cleaning, we recommend. Spraying
the. Surfaces. To be cleaned beforehand and allowing them to
soak for approx. 20 seconds.
•
Just press the PUMP button (Fig. 21) on the device and use the
trigger on the handle to spray water onto the surfaces to be
cleaned.
•
After a short soaking time, switch on the power button and
slowly vacuum the sprayed-in area with the appropriate nozzle
B6 / B7 (for carpets or upholstery)
•
Repeat the process several times until the dirt is completely
removed.
•
If the surfaces are too dirty, let the dirt soak with a cleaning
supplie
CAUTION: Please do not put any cleaning supplies in the fresh
water tank! Regular wet cleaning neutralizes unpleasant odors
in carpets, upholstery and textiles.
Wet cleaning is also recommended for car seats.
5. CLEANING AND MAINTENANCE ATTENTION:
Attention: Always pull the plug out of the socket before
cleaning and mantenance.
•
After each use, empty the water from the fresh water container
A4 and rinse the dirt collecting container A3 with clean water.
Let all parts dry well.
•
Until the fresh water container A4 and the dirt collecting
container A3 are completely dry, please mix your Hydra Rain pro
loosely so that there is enough air to dry the individual parts.
•
For reasons of hygiene and to extend the service life of your Hydra
Rain pro, please never leave liquids and dirt in your device.
•
The HEPA filter in motor unit A1 should be checked regularly for
contamination (Fig. 22). Unscrew the cover of the HEPA filter and
