CO2 Meter RAD-0501A Инструкция по эксплуатации - Страница 2
Просмотреть онлайн или скачать pdf Инструкция по эксплуатации для Контроллер CO2 Meter RAD-0501A. CO2 Meter RAD-0501A 4 страницы. Co2 controller

7. Safety Notice
Your safety is very important to us! To ensure correct and safe use of the
product, please read this entire User Manual before using the CO2 controller.
Otherwise, the protection provided by the equipment may be impaired.
These warnings provide important safety information and should be
observed at all times:
1.
Do not subject the unit to impact or shock. This may decrease
the sensor's precision.
2.
Do not place the unit or the power plug near a heat source. Heat
can cause distortion of the unit, which may result in fire.
3.
Do not open the CO2 Controller or touch any exposed
electronic circuitry under any circumstances. This could result in
electric shock.
4.
Use the attached power adaptor and cord in a grounded plug
only. Ungrounded power sources can cause serious damage to
the product, or result in injury or death to the user.
5.
Only connect devices to the controller that use grounded plugs.
8. Installation Instructions
1. Choose a suitable location at plant level to install the controller. Fix the
panel holder on the wall with the included screws.
2. Plug the piggyback plug into a 110-220 VAC (US only) grounded wall
socket to power the controller.
3. Greenhouse Mode: Plug a CO2 generator or bottled CO2 control
regulator into the piggyback plug.
4. Ventilation Mode: Plug an exhaust fan into the piggyback plug.
Note: Electrical devices plugged into the piggyback plug must draw
less than 5A at 110-250 VAC or less than 5A @ 30 VDC.
9. Changing Settings
The settings that can be changed are: Target, Mode, Calibration and Reset
Factory Defaults. Each is described below.
10. Changing the Target CO2
The default Target CO2 levels are 1,000ppm in Greenhouse Mode, and
1,200ppm in Ventilation Mode. Depending on the types of plants you are
growing, you may wish to change the Target levels. Using advanced
hysteresis logic, the displayed CO2 level will slightly vary around the Target
level to minimize piggyback plug power cycles. This variance is small, and
is normal.
To change the Target:
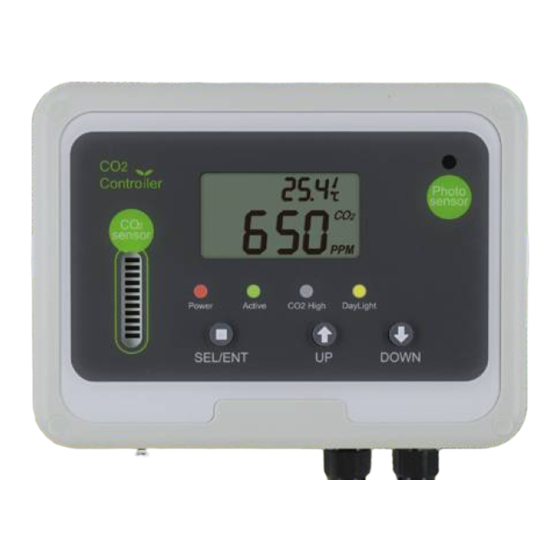
1. Press the SEL/ENT button once. The TARGET icon flashes.
2. Press SEL/ENT button for 2-3 seconds to enter Target mode.
3. Press the UP / DOWN buttons to adjust the Target CO2 level.
4. Press the SEL/ENT button again. SAVE appears on the LCD.
11. Changing the Mode
When the leaf icon is displayed, the controller is in Greenhouse
Mode. This mode maintains a pre-set CO2 level by powering the piggyback
plug during daylight only.
When if house icon is displayed, the controller is in Ventilation
Mode. This mode powers the piggyback plug when the CO2 level is above
the SetPoint level. In Ventilation Mode, the photo sensor is ignored.
To change the Mode:
1. Press the SEL/ENT button 3 times The MODE icon will flash.
2. Press SEL/ENT button for 2-3 seconds to enter the MODE setting.
3. Press the UP / DOWN buttons to change from GROU or VENT
4. Press the SEL/ENT button again. SAVE appears on the LCD
12. Calibration
Between growing cycles or at least once a year, you should manually
recalibrate the unit. We recommend you use fresh air (400ppm) for
calibration by taking the unit outdoors, plugging it in, and following the
procedure below. Optionally, you can calibrate using a cylinder of known
CO2 gas (0~2000ppm) connected to the "M" fitting. Wait at least 5 minutes
for the CO2 level on the LCD to stabilize, then follow this procedure.
1. Press the SEL/ENT button 2 times. The CAL icon will flash.
3. Press the SEL/ENT button for 2-3 seconds to enter the CAL mode.
The CO2 level on the LCD will flash.
4. Press the UP or DOWN buttons to select the CO2 calibration value.
Select 400ppm for outdoor/fresh air, or select the number that matches
the known CO2 gas cylinder rating.
5. Press the SEL/ENT button again to start calibration. Calibration will
take 3-5 minutes.
6. If the word PASS is displayed, calibration is complete.
7. If the word FAIL is displayed, retry the procedure.
8. If the word Er9 is displayed, refer to Error Codes below.
13. Reset Factory Defaults
Fix improperly set Target or manual calibration problems and return to
Greenhouse Mode by restoring the factory default settings:
Note: If you reset the Factory Defaults, the controller will revert to
Greenhouse Mode. If you are using a fan, you should immediately
change to Ventilation Mode for the device to work properly for your
application (See step 11 - Changing the Mode).
1. Press the SEL/ENT button 4 times. The RCFS icon will flash.
2. Press the SEL/ENT button for 2-3 seconds to enter the RCFS mode.
4. Press the UP or DOWN button to Select "Yes".
5. Press the SEL/ENT button to Save and reset factory defaults.
2
