DRAKE MQM6000L Руководство по эксплуатации - Страница 6
Просмотреть онлайн или скачать pdf Руководство по эксплуатации для Модулятор DRAKE MQM6000L. DRAKE MQM6000L 15 страниц. Multiplexing qam modulator

6
Installation & Mounting / Front Panel Controls
INSTALLATION AND MOUNTING NOTES
This equipment is designed to be installed in a standard 19" rack. When the unit is mounted above or below
other rack mounted equipment, a 1U space should be left between the unit and the other equipment to allow
ambient air flow between the units.
Connect the AC line cord to an appropriate source of 120 volt, 50/60 Hz AC power. The MQM6000Lis always
on once the AC power cord is connected to its power source.
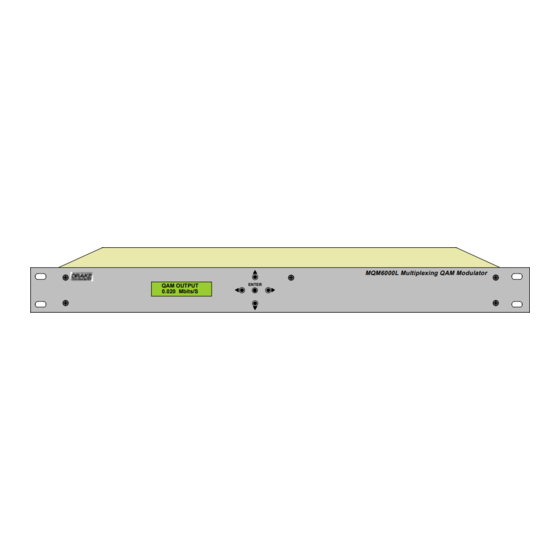
FRONT PANEL CONTROLS
F1, LCD Display – This display presents the selected
menu screen and the parameter settings. The backlight in
the display is on when power is applied.
When not in adjust mode the QAM output symbol rate in
Mbits per second is displayed.
Pressing the down button shows the buffer status as a
percentage of its maximum capacity. The left percentage
represents the current buffer status and the right number
represents the maximum percentage of buffer capacity that
was reached since the unit was last programmed. If either
of these numbers reaches 100%, it is probable that too
much data is being processed which will likely result in
missed frames, video or audio breakup, or other anoma-
lies in the output signal.
Repeatedly pressing the down button will toggle back and
forth between the buffer status screen and the QAM output
symbol rate screen.
Pressing the up button causes the display to show the
firmware version number. Repeatedly pressing the up
button will cause the display to toggle back and forth
between the firmware version number and either the QAM
output symbol rate screen or the buffer status screen,
which ever one is selected with the down button.
F1
F2
F5
ENTER
QAM OUTPUT
0.020 Mbits/S
F3
F4
F6
MQM6000L Multiplexing QAM Modulator
F2, ENTER button – Use the ENTER button to enter the
adjust mode or to save and load a new setting or settings
after adjustment. Hold for 2 seconds until the bottom line of
the display starts to flash to enter the adjust mode. After
entering the adjust mode, momentarily pressing the
ENTER button again will load and save any settings that
may have been changed using the F5 & F6 buttons.
F3 & F4,
Left and
and right arrow buttons to navigate from screen to screen
to view a parameter setting. These buttons are operational
in the view mode or the adjust mode. Using only these
buttons will not change any parameter settings. After a
short period of button inactivity, the default display will
be returned.
F5 & F6,
Up and
Down Buttons – Use the up and
down arrow buttons to change the value of a viewed
parameter setting. The unit must be in the adjust mode with
the display flashing in order for these buttons to become
active for changing a parameter setting. If the unit is not in
the adjust mode, pressing the up button will display the
firmware version number or pressing the down button will
display the output QAM symbol rate.
Right Buttons – Use the left
