Atlas F6-MF Руководство пользователя - Страница 8
Просмотреть онлайн или скачать pdf Руководство пользователя для Усилитель Atlas F6-MF. Atlas F6-MF 16 страниц. Multi-impedance modular amplifier
Также для Atlas F6-MF: Руководство пользователя (3 страниц)

F6-MF
Owner's Manual
Multi-Impedance Modular Amplifier
Rear Panel Features
1
5
4
9
8
2
3
6
7
1. AC Mains Power Switch
Connect this grounded power cord to 120VAC circuits only. Serious damage may result otherwise. The fuse for the F6-MF is internal to
the amplifier; only qualified personnel should replace the fuse, if necessary.
2. AC Mains Power Cord
Insert the IEC Power Cord into the receptacle making sure it is securely placed. Prior to plugging the F6 Power Cord into an AC source,
make sure the AC Mains Voltage select switch is in the correct position. Series damage may result otherwise.
3. AC Mains Select
Prior to plugging the AC Mains Power Cord to an AC source, determine the proper AC Mains voltage the amplifier will see. For voltages
between 103V - 127V, select 115V. For voltages between 207V - 253V, select the 230V switch position. Note: If the AC Mains Voltage
Switch is in the incorrect position when the power cord is plugged into an AC Mains the unit will trigger a protect circuit and the Over
Voltage LED will illuminate.
4. Over Voltage LED
If the Over Voltage LED is illuminating Red, it means the AC Mains Voltage Select Switch is in the incorrect position or the AC Mains
Voltage exceeded the operating range. Note: Unplug the AC Power Cord prior to changing the switch selection.
5. Standby LED
If the Standby LED is illuminating Orange, it means the F6-MF is in Energy Save Mode. The F6-MF is shipped with a shunt across the
CC contacts to activate the amp from Standby mode. This is to be used when remote activation is not required. If the standby LED is
not illuminating, the Front Panel Blue LED Power LED will be illuminated and the FM Modules' Ready LEDs (Green) will be on. This
means the amplifier is ready to use. If not, check the AC Mains and Power Switch.
6. System Activation
The F6-MF is activated via two methods. Contact Closure, shorting the CC and Ground Terminal together or by applying a DC Voltage
5–24V (+V) and the Ground (–). Note: For the F6-MF to turn ON, the AC Mains Power Switch needs to be in the "ON" position and the
contact closure must be shorted or have a DC voltage applied.
7. Balanced Input Connections
B alanced line level signals connect to the (+) (–) and (G) terminals. Note: If you are connecting an unbalanced line level input, tie (short)
the (G) and (–) terminals together.
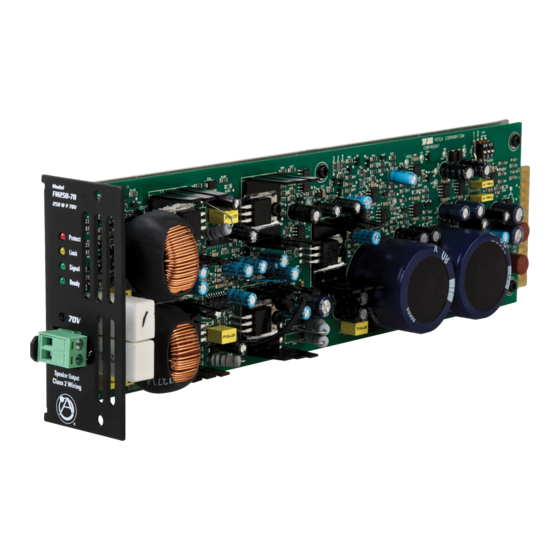
8. FM250 Amplifier Module Channel Slots
T he F6-MF is shipped with no FM250 amplifier modules. There are 6 empty card slots in a F6-MF . Each slot is shipped with a blank
filler panel covering each unoccupied slot. Note: If a slot is not being used, it is important that the blank cover plate is installed. Without
blank cover plate, amplifier cooling issues may occur.
9. Optional Accessory Input
This slot is for optional accessory items such as the FM-AMIX and the FM-IPDSP . Please refer to their manuals for installation procedure.
1601 Jack McKay Blvd. • Ennis, Texas 75119 U.S.A.
Telephone: 800.876.3333 • Fax: 800.765.3435
AtlasSound.com
– 8 –
Specifications are subject to change without notice.
