ARGSeguridad ZDAS-300 Руководство пользователя - Страница 9
Просмотреть онлайн или скачать pdf Руководство пользователя для Система безопасности ARGSeguridad ZDAS-300. ARGSeguridad ZDAS-300 16 страниц. Luxury voiced lcd alarm system

4.5 Selectable key fob require assistance with/without sounder
How to set the function: Press 'Sensor ' key and - - - appears on the LCD. Press the disarm
key on the registered Key Fob or entering the preprogrammed PIN code, LCD will display
'DEL Sensor' Use Key pad to select Zone(s) 0, then select key fob number 1 to 9.Program the
character of the Key Fob with 0 or 1 to suit. Press Key Fob or ESC to save and exit. refer to
figure 25.
4.6 Omitting a Zone
It may be a requirement to temporarily omit a selected Zone or a number of Zones when
the system is armed. When a zone is selected to be omitted it will only be omitted for current
operation. When next time your System is armed, the omitted ZONE or ZONES will be
re-enstated into the system.
Note: The function is suitable for the armed zone or zones. But 24 hour zone can never
be omitted.
How to Omit a zone or zones: Press Arm button on the panel, then using the numeric
keypad on the panel press the number of the zone want to be omitted, then press the Disarm
key, enter the PIN code to complete the operation.
4.7 Sounder or Silent alarm setting:
How to set the function: Press the # key for 2 seconds when the panel is in disarmed mode,
the symbol of speaker displays or disappears; When it displays, the panel would alarm with
sounder ON, while when it disappears, the panel will alarm silently.
Note: Whether the key fob alarms with/without sounder subjects to its own configuration.
When the panel is set with silent alarm, the key fob will still be sounder alarm if it is set with
sounder alarm.
4.9 Access the Control Panel from a remote telephone (mobile or
land line)
The Remote Control enables the use of the land line phone or mobile phone to remotely
control panel. Call the phone number of the line connected to the alarm panel, the panel will
answer the call after 1 to 8 rings (programmable). When the panel answers the call enter the
pre-programmed 6 digit PIN code on the phone keypad to gain access to the Panel.
If the correct 6 digit PIN code is entered a long tone will be emitted from the panel. If the
PIN code is incorrect, three short tones will be emitted from the panel.You must try again and
enter the correct PIN code.
21
LOG
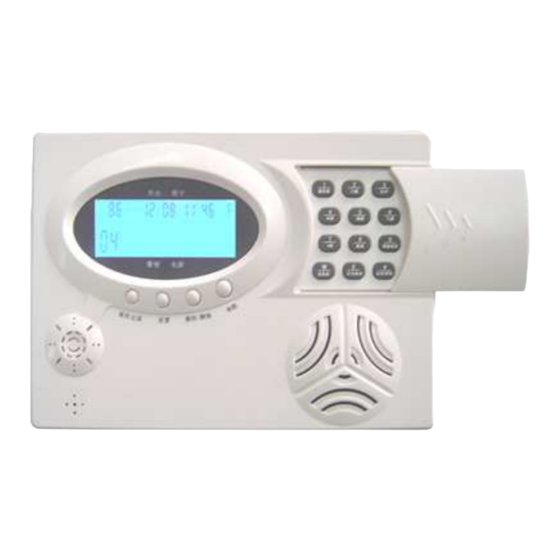
Figure7 : LCD display when alarmed
The figure shows that Zone 3 detector No2 has generated the Alarm signal at 6:10 on
th
18
, Oct.
3 INSTALLATION INFORMATION
3.1 The Basic Flow Chart for Registering Devices, Set Zone Type,
Set System Configuration and Program C.S. phone numbers and
Site Code in Disarmed mode.
1 To register Key fobs
2 To register Detectors
Press PROG key
3 To set Zone type
4 To set System configuration
5 To set C.S phone NO and account
Activate the key fob to be register CODE appears on LCD, comfirming the code has been received .
Press 0 to select key fob zone. Unit will auto register key fob with next reg. No , eg. If already 2 key
To register Key fobs
fobs registered, the new key fob will be allocated No 3.Press PROG to save the code. SENSOR
appears again to register more devices or press registered key fob to exit
OR
Activate the detector to be registered CODE appears on LCD, confirming the code has been received
Press 1--8 to select the zone you wish the detector to be allocated to. Unit will auto register the de-
To register Sensors
tector with next reg. No, eg, if already 3 detectors registered, the new detector will be allocated No 4.
Press PROG to save the code. SENSOR appears again to register more devices or press registered key
fob to exit
OR
Press * key ,LCD will display ZONE TYPE, press 1---8 to select zone, select 1 or 0 for all 7 fields
To set zone type
per zone. Press PROG to save. Press * key, LCD will display ZONE TYPE to reset the other ZONE
TYPE or press registered key fob to exit
OR
To set system config
Press # key, LCD will display SYS CONFIG, press 00 to 17 to select the configuration of the system.
Press PROG to save. Press # key, LCD will display SYS CONFIG to re_configure the system or press
registered key fob to exit
OR
Press * key, then press # key, the LCD will display PHONE , press 1 and display current C.S. Pry 1
phone No, enter new Pry 1 phone No, press PROG to save the phone, press * key then # key, the LCD
To set C.S phone number
will display PHONE, press 2 and display current C.S. Pry 2 phone No, enter new Pry 2 phone No,
press PROG to save, using this way, can set C.S. Account in Pry 7. or other private phone No, press
the registered key fob to exit
M
D
H
M
D
ALM
Press registered remote
SENSOR appears on LCD
key fob or enter your PIN
ready to register key fob or detectors
6
