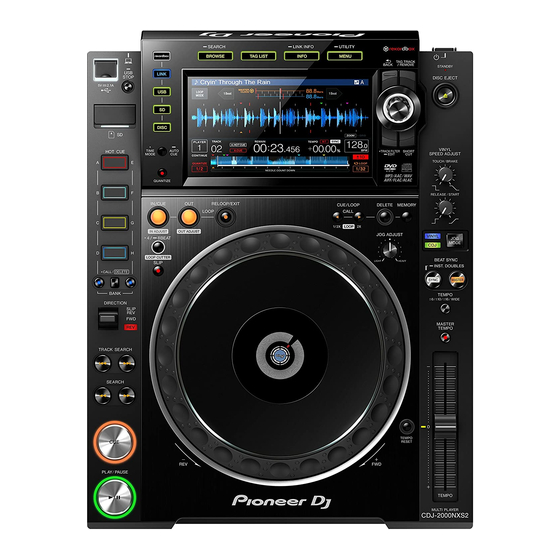
Pioneer CDJ-2000NXS2 Руководство по эксплуатации - Страница 28
Просмотреть онлайн или скачать pdf Руководство по эксплуатации для DVD-плеер Pioneer CDJ-2000NXS2. Pioneer CDJ-2000NXS2 43 страницы. Multiplayer
Также для Pioneer CDJ-2000NXS2: Руководство по эксплуатации (17 страниц), Краткое руководство по эксплуатации (4 страниц), Руководство по подключению (7 страниц)

Slip hot cue
1 Press the [SLIP] button.
The mode switches to the slip mode.
2 Press and hold the [HOT CUE] (A to H) button.
Hot cueing begins.
Normal playback of the sound playing in the background continues even
while the [HOT CUE] (A to H) button is pressed.
The [SLIP] button flashes in beat with the sound playing in the
background.
! At the point 4 beats after hot cueing began, the slip hot cue mode is
automatically canceled and normal playback of the sound that was
playing in the background resumes.
3 Release your finger from the [HOT CUE] (A to H)
button.
If the [HOT CUE] (A to H) button is released before 4 beats elapse from
the starting position of the hot cue, normal playback of the sound play-
ing in the background resumes.
Canceling the slip mode
Press the [SLIP] button.
The slip mode is canceled.
! The slip mode is also canceled when a track is loaded.
Playing from the touched position
on the waveform display
Touch the waveform display with your finger to easily play the audio
starting from the touched position. Move your finger while touching the
waveform display to quickly move to the desired position.
You can perform track search by touching the waveform display only in
the following conditions.
! In the pause mode
! While the jog dial is being pressed with the jog mode set to VINYL
Touch the waveform display during pause.
The current playing position on the playing address display moves to the
touched point.
! If you move your finger quickly, the playing address display may not
be shown properly.
Using the beat sync function
When beat sync is turned on, the BPM and beat position of tracks played
on this unit can automatically be synchronized with the DJ player con-
nected by PRO DJ LINK that is set as the sync master.
! The beat sync function does not operate for tracks that have not be
analyzed with rekordbox.
1 Press the [BEAT SYNC MASTER] button on the DJ
player you want to set as the sync master.
Set the DJ player you want to be the sync master.
When the beat sync function is on, the BPM display on the DJ player set
as the sync master changes to orange.
! rekordbox (Mac/Windows) can also be set as the sync master.
= For the procedure to set rekordbox (Mac/Windows) as a sync
master, see the rekordbox (Mac/Windows) user's manual.
28
En
2 Press the [BEAT SYNC] button.
The BPM and beat position of the currently playing track are synchro-
nized to the sync master.
! During synchronization, tempo control with the tempo slider is
disabled and the playing speed display switches to the tempo slider
position's BPM display, displayed in gray.
Changing the DJ player set as the sync
master
The sync master can be changed to another DJ player connected by
PRO DJ LINK as described below.
! Change or pause the track on the DJ player set as the sync master.
! Press the [BEAT SYNC MASTER] button on the DJ player set as the
sync master.
! Press the [BEAT SYNC MASTER] button on a DJ player other than
the one set as the sync master.
Starting playback from the same
playback position as the track loaded in
the DJ player set as the sync master
You can start playback from the same playback point as the track loaded
in the DJ player set as the sync master using the DJ player not set as the
sync master by the following methods.
! Load the track loaded in the DJ player set as the sync master to the
DJ player not set as the sync master.
! Press the [BEAT SYNC/INST.DOUBLE] button of the DJ player not
set as the sync master for over 1 second.
Canceling synchronization
Press the [BEAT SYNC/INST.DOUBLE] button.
! If the synchronized playing tempo (BPM) and the slider posi-
tion's tempo (BPM) do not match, the synchronized playing tempo is
maintained and tempo control with the tempo slider remains dis-
abled. Normal operation is restored when the position of the tempo
slider is moved to the synchronized playing tempo position.
! If the pitch is bent using the DJ player not set as the sync master, the
synchronization is canceled and the [BEAT SYNC/INST.DOUBLE]
button flashes.
Adjusting the beat grid
The enlarged waveform displays the beat grid with red lines. The beat
grid can be adjusted by the following procedure.
1 Press the rotary selector for at least 1 second.
The mode switches to the [GRID ADJUST] mode.
2 When the rotary selector is turned, the beat grid is
adjusted.
You can adjust from the menu screen by touching the [MENU/UTILITY]
button.
! [RESET]: Resets the adjusted beat grid.
! [SNAP GRID(CUE)]: Moves the first beat to the position of the
currently set cue.
! [SHIFT GRID]: Reflects the results adjusted during synchroniza-
tion (pitch bend, etc.) on the beat grid.
3 Press the rotary selector for at least 1 second.
Return to [ZOOM] mode.
