DOEPFER LMK2+ Руководство пользователя - Страница 5
Просмотреть онлайн или скачать pdf Руководство пользователя для Электронная клавиатура DOEPFER LMK2+. DOEPFER LMK2+ 12 страниц. Midi master keyboard usb version
Также для DOEPFER LMK2+: Краткое руководство по эксплуатации (6 страниц)

7. OPERATION OF THE KEYBOARD
7.1 SWITCHING THE KEYBOARD ON
When the keyboard is switched ON – i.e. if the external power supply is connected or a USB connection is
established – a message regarding the software version will appear for several seconds on the display (for
example "201" for version 2.01) and the LEDs will flicker for several seconds. After that the keyboard will go into
the PLAY-mode and all settings made before turning the keyboard off previously are automatically called up
(non volatile memory for the last settings). The PLAY-mode is indicated by the letters "PLA" on the display.
7.2 MENU STRUCTURE
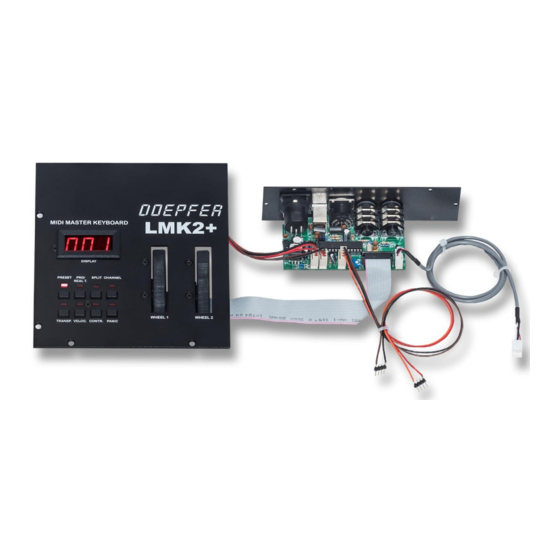
There are 8 menus available which are selected by means of the 8 MENU-buttons. A menu is selected by
pressing the corresponding MENU-button. The LEDs above the MENU-buttons indicate which menu is active at
any given time. Menus are exited simply by pressing a different MENU-button. Some menus are exited by
pressing the same MENU-button a second time or by pressing one of the keys on the keyboard. If none of the
LEDs is illuminated the keyboard is in PLAY-mode. PLAY-mode is always indicated by the absence of
illuminated LEDs and the letters "PLA" on the display. In some menus both the controls and certain keys on the
keyboard are utilized to set parameters.
The following menus correspond to the MENU-buttons (from left to right):
Upper row
1
PRESET
2
PROGRAM CHANGE/BANK/REALTIME
3
SPLIT
4
CHANNEL
In the next few paragraphs the function of each menu is briefly discussed. A detailed description of each menu
can be found in the next section after that.
1 PRESET
The LMK2+ has 17 presets. Each preset contains data about all 4 keyboard zones and their corresponding
keyboard ranges, Midi-channels, transpositions, allocation and activation of the controllers and the velocity-
response curve. Preset 1 is the user definded preset that is called up when turning on the keyboard and that is
automatically altered whenever the user changes any zone parameter.
Presets 2-17 are 16 factory presets which are fixed and cannot be altered by the user. The PRESET-menu
serves to select the user preset (1) or one of the the 16 factory presets.
2 PROGRAM CHANGE/BANK/REAL TIME
This menu, in conjunction with the keys of the keyboard, is used to send Midi-program change and Midi-bank
select messages (Midi controllers #0 and #32) to the devices connected to the LMK2+. Also, in this menu the
Midi-real time messages START, STOP and CONTINUE can be sent. Certain keys of the keyboard are used for
this purpose.
3 SPLIT
The LMK2+ can transmit on up to 4 Midi-channels simultaneously. Each Midi-channel is assigned a part of the
keyboard, a so-called keyboard zone or split range. Overlaps between the zones are possible (i.e. some keys
are used by more than one zone). The SPLIT-menu is used to define the keyboard zones, i.e. the
lowest/highest key for each of the 4 zones.
4 CHANNEL
In this menu the Midi-channels for the 4 keyboard zones are set.
5 TRANSPOSE
In this menu the transpositions of the 4 keyboard zones are set.
6 DYNAMIC
In this menu the velocity-response curves for the 4 keyboard zones are set. 16 different velocity tables are
available.
5
6
7
8
LMK2+/USB User's Guide Page 5
Lower row
TRANSPOSE
DYNAMIC
CONTROLLERS
PANIC
