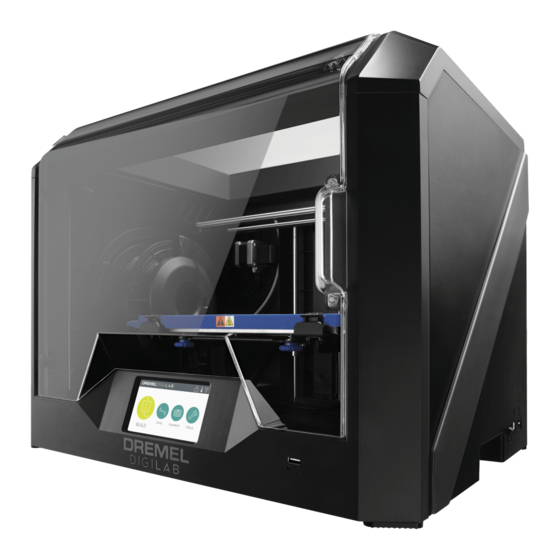
Dremel DigiLab 3D45 Hızlı Başlangıç Kılavuzu - Sayfa 2
3D Yazıcılar Dremel DigiLab 3D45 için çevrimiçi göz atın veya pdf Hızlı Başlangıç Kılavuzu indirin. Dremel DigiLab 3D45 2 sayfaları. Print removal
Ayrıca Dremel DigiLab 3D45 için: Servis Talimatları (4 sayfalar), Kullanım Kılavuzu (2 sayfalar), Manuel (4 sayfalar), Servis Kılavuzu (4 sayfalar), Kalibrasyon Kılavuzu (2 sayfalar), Hızlı Başlangıç Kılavuzu (2 sayfalar)

FILAMENT
OBSERVE ALL PROVIDED WARNINGS AND SAFETY
WARNING
WARNING
INSTRUCTIONS WHEN USING THE DREMEL 3D45.
FAILURE TO DO SO MAY RESULT IN FIRE, EQUIPMENT DAMAGE,
PROPERTY DAMAGE OR PERSONAL INJURY.
FILAMENT INSTALLATION
1. Tap "Filament" on your Dremel 3D45's touch screen and wait for extruder to
heat.
2. Twist spool door counter-clockwise and remove.
3. Place filament spool onto spool holder with spool being fed from the bottom
towards the back of the Dremel 3D45.
4. Thread filament through filament guide tube all the way to the extruder area and
close spool door.
5. When Feed Filament screen appears, tap "Next" and thread filament into
extruder intake until extruder feeds through on its own.
6. When new filament appears from extruder tip, tap "Done" to complete filament
load process.
7. When you place a roll of Dremel filament into the spool holder, the printer will
auto-recognize the filament type and optimize the printer settings accordingly.
8. You have the option to manually alter print settings after you change filament.
Please check all settings if manually entered, as improper settings may cause
prints to fail, property damage, or personal injury. Please see Page 25 in the
3D45 instruction manual for recommended print settings for Dremel filament
types.
LEVELING
LEVELING BUILD PLATFORM
1. Apply a thin layer of glue with the provided glue stick to the build platform
and secure in place.
2. Tap "Level" on your Dremel 3D45's touch screen.
3. 3D45 will first check the level at the back of the build platform, then move
to the first leveling position.
4. The touchscreen will indicate if your build platform is too high or too low.
a) If the build platform is too high, turn knob to the right until you hear a
"beep". Tap "Verify" to check the bed
level again.
b) If the build platform is too low, turn knob to the left until you hear a
"beep". Tap "Verify" to check the bed level again.
5. Repeat step above for the second levelling position.
6. When the build platform is level, extruder will automatically move to the
calibration position and complete the
levelling process.
BUILDING
BUILDING OUT OF THE BOX
1. On the main screen, tap the "Build" option. Then tap the machine icon to
select from pre-installed models.
2. Tap on the model file you would like to build and tap "Build".
3. Your Dremel 3D45 will align the extruder with the build platform and will
begin heating the extruder and build platform.
4. Once the correct temperature is reached, your model will begin to build.
5. Touch screen will display "Build Complete ".
REMOVING YOUR OBJECT FROM THE BUILD
PLATFORM
6. Wait for the extruder and platform to cool before removing your object.
7. With the object still attached, remove build platform from the build area.
8. Use your hand to peel your object from the build platform. If needed, gently
use the object removal tool to remove object from build platform.
CAUTION: Build platform may be hot immmedietly after print finishes, hold
platform on edges.
MAKE YOUR OWN
For info on designing, slicing, and printing
your own models go to...
DremelDigiLab.com/GetStarted
BEST PRACTICES
1. ALWAYS USE PROVIDED GLUE STICK.
2. Ensure your platform is level (before you begin building
your object).
3. Ensure spool is tangle free, installed properly and can rotate freely.
4. When loading filament, allow Dremel 3D45 to extrude until material is
consistent with the installed filament color.
5. It is important to stay near your Dremel 3D45 during operation and watch
the Dremel 3D45 begin building objects. (If a situation occurs, select the
STOP icon right away, to stop any further building).
6. Remove the build platform before removing the object.
7. Use object removal tool gently to avoid damaging the build platform or
object.
English
1
5
8
1
4a
5
1
3
8
3D45 RESOURCES
Quick Start Guide
3D45 Website
3D45 Customer
Support
Desktop Slicing
Software
More Details on 3D45
Setup and Maintenance
SIDE 2
Open
2
Close
7
3
4b
6
2
In box and www.dremeldigilab.com/GetStarted
www.dremeldigilab.com
1-844-4DRML3D
(1-844-437-6533)
Installed from www.dremeldigilab.com
or from USB flash drive provided
with the Dremel 3D45
Manual in box and on www.dremeldigilab.com
