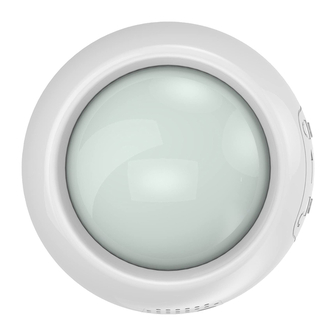
Aeotec MultiSensor Kurulum Talimatları
Aksesuarlar Aeotec MultiSensor için çevrimiçi göz atın veya pdf Kurulum Talimatları indirin. Aeotec MultiSensor 3 sayfaları. Z-wave 4-in-1 sensor:
motion, temperature, humidity, and light sensor
Ayrıca Aeotec MultiSensor için: Kullanıcı Kılavuzu (10 sayfalar)

MultiSensor
(Z-Wave 4-in-1 Sensor:
Motion, Temperature, Humidity, and Light Sensor)
Introduction:
The Aeotec MultiSensor is a USB or battery-powered
Z-Wave motion sensor, temperature sensor, humidity
sensor, and lighting sensor all in one package. The
sensor will send radio signals to up to 6 associated
Z-Wave devices within its own Z-Wave network when
the Motion Sensor detects IR changes in front of its
viewing window.
Indoor/Outdoor functional tolerances allow the Aeotec
MultiSensor to function under weatherized conditions.
Various sensitivity levels can be configured to avoid
unintentional triggering from small animals such as cats
and dogs.
By taking advantage of the Z-Wave mesh network,
commands can be routed to their destination via
intermediary "listening" Z-Wave products. Products that
are Z-Wave certified can be used and communicate with
other Z-Wave certified devices.
Package Contents:
1
1) MultiSensor
2) Back-Mount Plate
6
3) Back-Mount Arm
4) AAA Batteries (x4)
5) USB Cable
6) Screws (x2)
2
3
5
4
Important Disclaimer:
This product uses radio to wirelessly communicate
data between itself and other devices. Radio
communication is inherently not always 100%
reliable, and as such, this product should not be
used in situations in which life and/or valuables are
solely dependent on its function.
Technical Specs
· MultiSensor Physical Instructions:
Lock/Unlock
Half-Dimple
Markers
Motion Sensing
Window
LED
Sensitivity Knob
Temperature/
Humidity Sensor
Z-Wave Button
USB Power Port
Back Mount Hook
Back Mount Plate
Battery Holder
Back Mount Arm
Friction Lock
· MultiSensor Power Instructions:
The Aeotec MultiSensor has built in battery level detection. It will
automatically report its battery level to the associated gateway
throughout its life until the battery is fully drained and needs
replacing. The battery status will often be displayed in the user
interface of the gateway.
When used properly in an optimized Z-Wave network, operation via
battery can function for 12 months before battery replacement.
Unlock the MultiSensor from it's battery cover by twisting the
1
battery cover from the main unit in a counter-clockwise motion
and pulling the battery cover outward to separate the main unit
from the battery cover.
Battery Cover
Main Unit
Unlocked
Sensitivity
Insert 4 AAA batteries oriented
2
according to the picture located
AAA
in the battery holder (with the
A
A
A
negative end depressing the
battery spring).
AAA
A
A
A
Lock the MultiSensor main unit to its battery cover by aligning
3
the Lock/Unlock Half-Dimple Markers under the "unlock"
symbol and twisting the battery cover from the main unit in a
clockwise motion until the Lock/Unlock Half-Dimple Markers
form a circle under the "lock" symbol (a tangible click will be
felt).
Battery Cover
Locked
Main Unit
Recommendation: For networks which do not have a method to
display the battery level of the Aeotec MultiSensor, it is
recommended that the sensor be tested occasionally to ensure
that the battery still hold enough charge to operate. Batteries
naturally lose their charge over time.
· Motion Sensor Effective Range:
1
Celling
10 meters
2
Wall
· Weatherization Orientation:
Water can enter
humidity sensor
CORRECT
WRONG
· MultiSensor Physical Installation Instructions:
There are 2 methods to physically mount the MultiSensor on the
wall or ceiling. It can be mounted flat against the wall via the
Back-Mount Plate or angled in a direction via the Back-Mount Arm.
Important: The MultiSensor is weatherized and can operate
outdoors in rain and snow. Placed outdoors where directly exposed
to rain and snow, the MultiSensor should be oriented such that the
Temperature/Humidity Sensor is facing downward and positioned
on the bottom of the unit. (See the Weatherization Orientation
section.)
Mounting the MultiSensor flat against the wall via the
1
Back-Mount Plate.
Back Mount Plate
Mounting the MultiSensor angled in a direction via the
2
Back-Mount Arm.
Back Mount Arm
3 meters
Ground
Tighten/Loosen
Friction Lock
Back Mount Plate
Note: The Back-Mount Arm may be locked in various angles by
turning the Friction Lock clockwise and counter-clockwise to
tighten or loosen (respectively) the angle of the arm.
Recommendation: For best performance, the MultiSensor should
NOT be mounted directly on or near metal framing or other large
metallic objects. Large metal objects may weaken the radio signal
transmitted.
· Adjusting the Sensitivity on the MultiSensor
Turn the Sensitivity Knob in a clockwise direction to increase
sensitivity and counter-clockwise to decrease sensitivity.
Ground
Sensitivity Knob
Sensitivity
AAA
A
A
A
AAA
A
A
A
