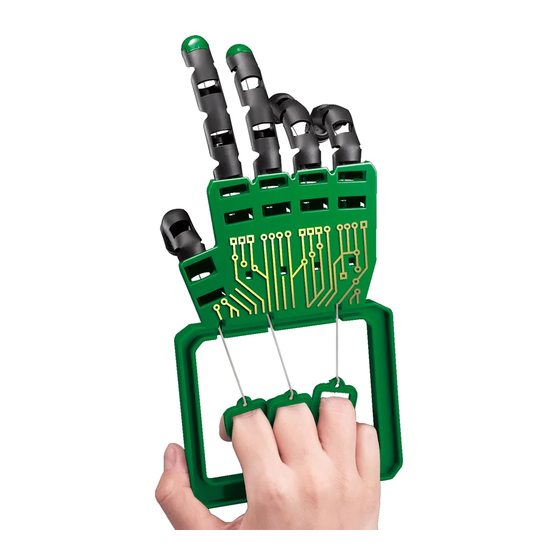
4M Robotic Hand Інструкція - Сторінка 2
Переглянути онлайн або завантажити pdf Інструкція для Робототехніка 4M Robotic Hand. 4M Robotic Hand 2 сторінки.

C. ASSEMBLY
Remarks: You need to tie a number of knots on the fishing line in the following assembly
instructions. Fishing line is elastic and the knots may loosen themselves over time. Use the
measurement templates which indicate the knot positions and lengths of line required.
Always tie a few knots to secure the knot in place. Allow extra fishing line when tying the
knots. You can always cut away the excess length after the knots are finished.
1. Starting with the little finger, examine the finger tubes. The end with the narrow ring is
the tip and the end with the wider ring is the finger root, which slots into the hand frame.
Cut a piece of fishing line 28 cm long. Use TEMPLATE A below for measurement. Place the
fishing line on the template and mark the three knot positions with a marker or ball pen on
the fishing line. Thread the line through a finger end cap. Tie a few knots at the first knot
position to stop it slipping back through the hole in the cap.
2. On the inside of the rings on the finger tubes are small sleeves. Feed the other end of the
fishing line through all the sleeves to the end of the finger tube.
3. Now slot the end cap into the end of the finger.
4. Hold the hand frame with the plastic loops facing upwards. Push the finger tubeʼs root
end into the first loop. The sleeves holding the fishing line must also be uppermost so that
the fingers will bend the correct way.
5. Repeat 1 to 4 steps again for the ring finger (the one next to the little finger).
6. Tie the fishing lines from the first two fingers together at the second knot position. The
tied lines should be tight after they are tied. This will allow the fingers to bend properly
when the lines are pulled.
7. Thread the ends of the two fishing lines through the first hole in the square holder frame.
Tie them into the hole in a pull ring at knot position 3. By now the pull ring should be touch-
ing the upper edge of the frame. Cut off any excess fishing line after you have tied all the
knots. Try pulling the pull ring — the two fingers should bend properly. If they donʼt, re-do
the knots.
8. Repeat the above steps for the middle and index finger tubes.
9. For the thumb, cut a piece of fishing line 23 cm long and mark the two knot positions
following TEMPLATE B below. Now follow steps 1 to 4. Unlike the first four fingers, the
thumb does not share a pull ring with another finger. Just tie the line directly to the pull ring
at the second knot position.
Check all knots are secured and pull the rings to see if all fingers bend properly. Cut away
the excess length. Congratulations! Your Robot Hand is complete.
cm
0
1
2
3
4
5
TEMPLATE A
knot 1
TEMPLATE B
knot 1
6
7
8
9
10
11
12
13
14
15
16
17
knot 2
knot 2
tie a few knots
tie a knot
tie a few knots
18
19
20
21
22
23
knot 3
cm
24
25
26
27
28
29
