Bender COMTRAXX COM460IP Короткий довідник - Сторінка 4
Переглянути онлайн або завантажити pdf Короткий довідник для Шлюз Bender COMTRAXX COM460IP. Bender COMTRAXX COM460IP 4 сторінки. Bms-ethernet-gateway for the connection of the bender measuring device interface to tcp/ip networks

COMTRAXX® COM460IP
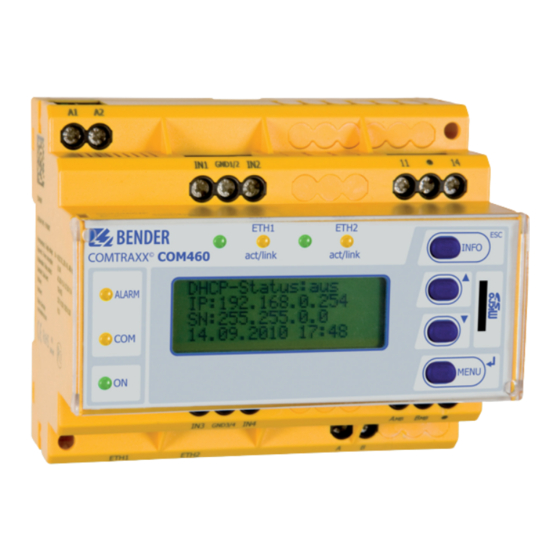
5. Display and operating controls
12
COM460IP
3
2
1
Key
1
LED "ON" lights when the supply voltage is switched on
2
LED "COM" lights when the gateway is responding to BMS re-
quests
3
LED "ALARM" lights when an internal device error occurs
4
LED "ETH1 act/link" flashes when data is being transferred
5
LED "ETH2 act/link" flashes when data is being transferred
6
"INFO" button to query the COM460IP for device-specific in-
formation
"ESC" button to leave the menu function without changing
the parameters
7
"" button: to move up in the menu, to increase the param-
eter value
8
Micro-SD card
9
"" button: to move down in the menu, to decrease values
10
"MENU" button for starting and exiting the menu
"↵" button to confirm parameter change
11
LC display for standard and menu mode
12, 13 No function (reserve)
7. Using the web user interface
System requirements
•
Microsoft Silverlight (version 5.0 or higher) must be installed.
•
JavaScript should be activated; e.g. necessary for report and
software update.
•
The pop-up blocker for the IP address of the COM460IP should
be deactivated. Otherwise, access to the manual, the software
updates and the network settings could be hampered.
Alle Rechte vorbehalten. Nachdruck und Vervielfältigung nur mit
Genehmigung des Herausgebers. Änderungen vorbehalten!
©
Bender GmbH & Co. KG
Fotos: Bender Archiv.
Bender GmbH & Co. KG
P.O. Box 1161 • 35301 Gruenberg • Germany
Londorfer Strasse 65 • 35305 Gruenberg • Germany
Tel.: +49 6401 807-0 • Fax: +49 6401 807-259
E-mail: [email protected] • www.bender.de
EN-2
4
13
5
6
11
6. Commissioning of the device
1.
Switch the supply voltage on.
2.
Set the IP address.
7
If the computer network has a DHCP server, the IP address will
be assigned automatically. The following message will then
8
appear on the display of the COM460IP: "DHCP status: Active".
The IP address will be indicated.
9
If the computer network does not provide a DHCP server, the
10
IP address and network mask are to be set as specified by the
EDP administrator:
– Press the "MENU" button on the COM460IP
– Select "3. Settings" > "1. Server" > "1. IP" > "1. IP"
– Set the IP address and network mask using the "" or ""
button. Confirm each block with "↵".
A fixed IP address was assigned to the device. Therefore it is
necessary to switch off the DHCP function of the COM460IP:
– Select "3. Settings" > "1. Server" > "3. DHCP" > "1. DHCP"
– Select "off" using the "" or "" button
– Confirm the change with "↵"
3.
Set the BMS bus address in the menu of the COM460IP:
– Press the "MENU" button on the COM460IP
– Select "3. Settings" > "2. Interface" >
"1. Address"
– Set the address using the "" or "" button
– Confirm the BMS address change with "↵"
Getting started
1.
Start the Internet browser.
2.
Read the IP address from the display of the COM460IP and
enter the address into the Internet browser.
3.
Select the user language for the web user interface. Click on
the language you want to use resp. click the appropriate flag.
4.
Click on "Bus overview" to get a graphic representation of all
BMS bus devices.
5.
Select "Tools" > "Manual" to open the manual.
All rights reserved. Reprinting and duplicating only with
permission of the publisher. Subject to change!
©
Bender GmbH & Co. KG
Photos: Bender archives.
COM460IP_D00023_02_Q_DEEN/01.2016
