Gardena 1892 Посібник оператора - Сторінка 7
Переглянути онлайн або завантажити pdf Посібник оператора для Газонна та садова техніка Gardena 1892. Gardena 1892 18 сторінок. Water control
Також для Gardena 1892: Посібник оператора (19 сторінок), Посібник оператора (19 сторінок)
Active (manual) watering v (Fig. I):
1 Manual watering
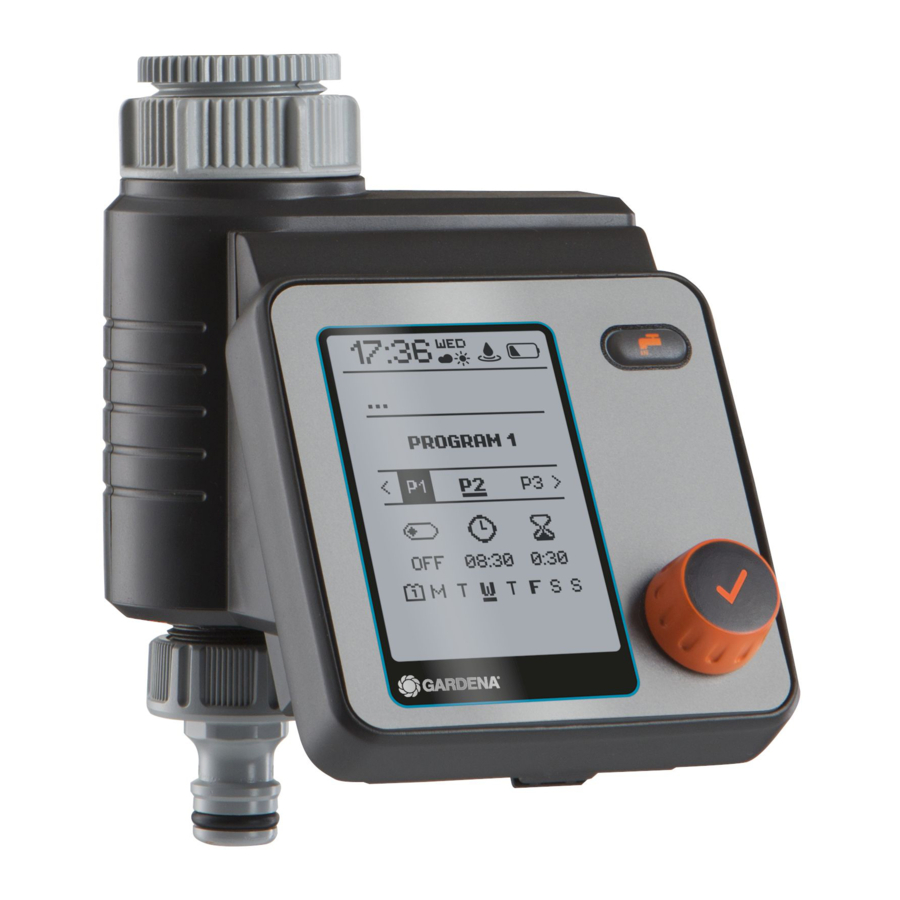
Setting schedules v (Fig. H):
1 Set schedule | 2 Schedule 1
Configure and save up to 6 different watering
schedules by setting the start time, duration and
weekdays for each one. Schedules can be acti-
vated or deactivated by pressing on / off (see fig. H).
Default display v (Fig. J):
1 Idle screen | 2 Programs
Seasonal watering duration v (Fig. K):
1 Menu: Seasonal Run Time | 2 Regular Run Time |
3 Reduce Watering
You can reduce the durations set for all schedules
at once in 10% increments, from 100% down
to 10%. This saves you having to change each
of the 6 schedules individually.
Tip: Less watering is required in the spring and
autumn than in the height of summer. Simply set
the maximum watering duration for high summer
as the default. Then reduce the watering duration
for all schedules at once in convenient 10 % incre-
ments when there is less need for watering.
Note: When you change the percentage, the dura-
tion is adjusted within the schedules and the
"cloud" symbol appears. If the duration is not
altered (= 100 %), the "sun" symbol is displayed.
Rain pause v (Fig. L):
1 Menu: Rain pause | 2 Pause / 3 days
Pauses all watering operations without changing
the set schedules. You can select any number of
days between 1 and 9. At the end of the pause,
all schedules are reactivated.
Deleting a schedule v (Fig. M):
1 Menu: Delete schedule | 2 Delete schedule 1
Soil Moisture Sensor, Art. 1188
(optionally available) v (Fig. D and N):
1 Menu: Soil Moisture Sensor
Once the soil is sufficiently moist, a water-
ing operation is interrupted or a schedule is disa-
bled so that it cannot be activated. This does not
affect active (manual) watering.
v (Fig. D and N):
1 Connect soil moisture sensor
After a soil moisture sensor is connected, the
"sensor activated / deactivated" display will appear –
this can take up to 1 minute. Select an option to
activate/deactivate the sensor response. Use the
switching point controller on the soil moisture sen-
sor to set the level of soil moisture that must be
achieved before the sensor responds (see Opera-
tor's Manual for GARDENA Soil moisture sensor).
9