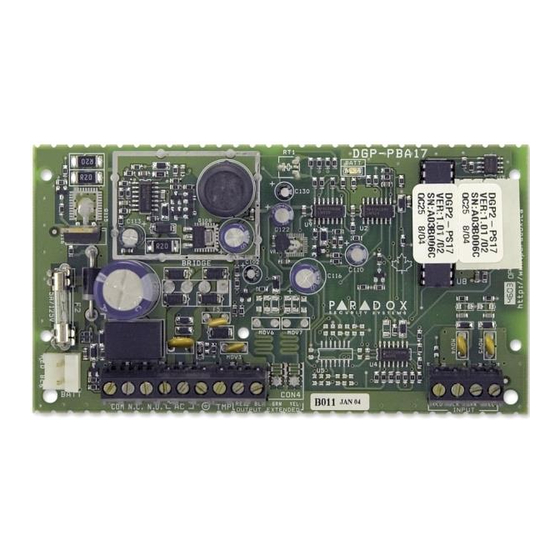
Digiplex DGP2-PS17 Короткий посібник
Переглянути онлайн або завантажити pdf Короткий посібник для Джерело живлення Digiplex DGP2-PS17. Digiplex DGP2-PS17 2 сторінки.

Power Supply Module V1.0
(DGP2-PS17)
Instructions
DGP2PS17-EI00
I
NTRODUCTION
The Power Supply Module (DGP2-PS17) is a fully supervised 1.7A switching
power supply that is connected to the communication network of the Digiplex
(DGP-48) or DigiplexNE (DGP-NE96) control panel.
I
NSTALLATION
The DGP2-PS17 is connected to the control panel's communication
network in a star and/or daisy chain configuration. This 4-wire
communication network provides power and two-way communication
between the control panel and all modules connected to it. Connect the four
terminals labeled red, black, green and yellow of the DGP2-PS17 to the
corresponding terminals on the control panel as shown in Figure 1 (refer to
reverse side). Connect the 5A PGM output of the DGP2-PS17 as shown in
Figure 1, Inset 2 (refer to reverse side).
P
M
ROGRAMMING
ETHOD
To program the DGP2-PS17, you must enter the "Module Programming
Mode" using any keypad in the system:
1) Press and hold the [0] key.
2) Key in the [
INSTALLER CODE
3) Key in section [953] (DGP-48) / [4003] (DGP-NE96).
4) Key in the DGP2-PS17's 8-digit [
5) Key in the 3-digit [
] you wish to program.
SECTION
6) Turn the desired option ON/OFF or key in the required data.
Please note that the serial number is located on the DGP2-PS17's PC
board. The DGP2-PS17 can also be programmed using the control panel's
Module Broadcast feature as well as through the WinLoad Software (V2.0
or higher). Refer to the Digiplex or DigiplexNE Reference & Installation
Manual for more information on the Module Broadcast feature and to
WinLoad's Online Help for information on programming with WinLoad.
Tamper Recognition
The DGP2-PS17 does not come equipped with a tamper switch. If your
installation requires tamper recognition, enable this feature and connect a
tamper switch as shown in Figure 1, Inset 1 (refer to reverse side). When a
tamper is detected on the module, it will send a tamper report to the control
panel via the communication network. Default: Option [1] is OFF.
Battery Charging Current
Turning option [2] ON will set the battery charging current at 700mA.
Turning option [2] OFF will set the battery charging current at 350mA. A
battery charging current of 350mA will require more time to charge the
battery compared to 700mA but will consume less power from the module
itself. Default: Option [2] is OFF.
].
].
SERIAL NUMBER
Section [001] - Option [1]
Section [001] - Option [2]
PGM Deactivation Option
When the PGM Activation Event occurs, this option determines when the
PGM will return to its normal state (deactivate). When option [3] is ON, the
PGM will deactivate when the PGM Timer programmed in section [003] has
elapsed. When option [3] is OFF, the PGM will deactivate when the PGM
Deactivation Event programmed in sections [008] to [011] occurs.
Default: Option [3] is OFF.
PGM Base Time Selection
If the PGM Deactivation Option (section [001] option [3]) is set to follow the
PGM Timer, you must define whether the PGM Timer programmed in
section [003] is in minutes or seconds. If option [4] is ON, the PGM Timer
will be in minutes. If option [4] is OFF, the PGM Timer will be in seconds.
Default: Option [4] is OFF.
PGM Timer
If the PGM Deactivation Option (section [001] option [3]) is set to follow the
PGM Timer, the value programmed in section [003] represents how long
the PGM will remain in its opposite state after being activated. To program
the timer, enter a 3-digit decimal value (001-255) into section [003], where
this value is multiplied by the PGM Base Time Selection (section [001]
option [4]) of 1 second or 1 minute. Default: 005.
PGM Activation Event
The PGM Activation Event determines which event will activate the DGP2-
PS17's on-board PGM output. The Event Group specifies the event, the
Feature Group identifies the source, and the Start # and End # sets the
range within the Feature Group. Use the PGM Programming Table in the
Digiplex/DigiplexNE Modules Programming Guide to program the DGP2-
PS17 PGM Activation Event. Enter the sections that correspond to the
Event Group, Feature Group, Start # and End # of the PGM and enter the
required data.
Event Group
Feature Group
PGM
[004]
Only Event Groups 000 to 055 can be used to program the
DGP2-PS17's PGM Activation Event.
PGM Deactivation Event
If the PGM Deactivation Option is set to follow the PGM Deactivation Event
(Section [001] option [3]), the PGM will return to its normal state when the
event programmed in sections [008] to [011] occurs. The Event Group
specifies the event, the Feature Group identifies the source, and the Start #
and End # sets the range within the Feature Group. Use the PGM
Programming Table in the Digiplex/DigiplexNE Modules Programming
Guide to program the DGP2-PS17 PGM Deactivation Event. Enter the
sections that correspond to the Event Group, Feature Group, Start # and
End # of the PGM and enter the required data.
Event Group
Feature Group
PGM
[008]
Only Event Groups 000 to 055 can be used to program the
DGP2-PS17's PGM Deactivation Event.
Section [001] - Option [3]
Section [001] - Option [4]
Section [003]
Sections [004] to [007]
Start #
[005]
[006]
Sections [008] to [011]
Start #
[009]
[010]
End #
[007]
End #
[011]
