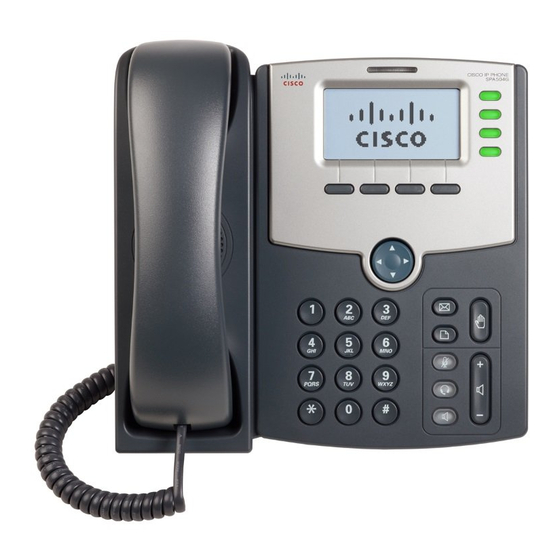
Cisco Small Business Pro SPA 504G Посібник з налаштування та користування - Сторінка 2
Переглянути онлайн або завантажити pdf Посібник з налаштування та користування для IP-телефон Cisco Small Business Pro SPA 504G. Cisco Small Business Pro SPA 504G 9 сторінок. 4-line ip phone
Також для Cisco Small Business Pro SPA 504G: Посібник з налаштування та користування (8 сторінок), Посібник користувача (18 сторінок), Посібник із швидкого старту (2 сторінок), Посібник із швидкого старту (2 сторінок), Посібник з налаштування та користування (19 сторінок), Посібник із швидкого старту (5 сторінок), Посібник із швидкого старту (7 сторінок), Посібник користувача (2 сторінок), Посібник користувача (8 сторінок), Посібник користувача (2 сторінок), Посібник із швидкого старту (14 сторінок), Короткий посібник користувача (2 сторінок), Посібник із швидкого старту (18 сторінок), Посібник із швидкого старту (7 сторінок), Посібник (7 сторінок), Посібник з конфігурації (12 сторінок), Посібник з конфігурації (12 сторінок), Посібник користувача (8 сторінок), Посібник із швидкого старту (21 сторінок), Посібник користувача (12 сторінок), Посібник із швидкого старту (2 сторінок), Коротка довідкова картка (2 сторінок), Посібник (5 сторінок), Короткий довідник (4 сторінок), Короткий посібник користувача (9 сторінок), Інструкція (2 сторінок), Короткий довідник (2 сторінок), Налаштування (8 сторінок)
- 1. Installing Your IP Phone
- 2. Using a Wireless Connection
- 3. Using the Call Features of the Cisco SPA504G
- 4. Placing a Call
- 5. Answering a Call
- 6. Ending a Call
- 7. Placing a Conference Call
- 8. Conference Call Tips
- 9. Blind Transferring
- 10. Warm Transferring
- 11. Call Forwarding
- 12. Do Not Disturb
- 13. Accessing Voice Mail
- 14. Recording Unavailable Voice Message
- 15. Paging