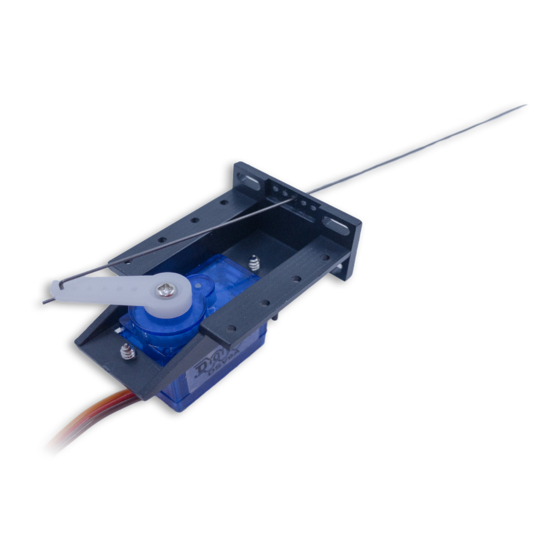
Digitrax DSXSV9 Instrucciones - Página 2
Navegue en línea o descargue pdf Instrucciones para Sistemas de control Digitrax DSXSV9. Digitrax DSXSV9 2 páginas. 9g turnout or motion control servo, with mount bracket and installation hardware

2.0 DSXSV9 suggested Layout Installation
1.
The servo arm moves the drive-wire through the turnout throw-bar hole
using an approx 1/2" access clearance hole or slot through the layout base
material, centered under the throw-bar drive hole. Use base-template below.
2.
Pass the free end of the drive-wire through the access hole and then through
the throw-bar center hole. There will be excess drive-wire tip to trim later.
3.
Align the servo mount so that the drive-wire will move in the throw-bar ac-
tuation direction. Set mount orientation so Thrown/ Clockwise horn rotation
will drive the throw-bar to the diverging or Thrown turnout direction .
4.
Use two 5/16" long mount screws to hold the unit when in the correct posi-
tion. There are mount slots for up to 4 mounting screws and the slots allow
some fine position and orientation adjustments using screw pairs.
5.
Connect the servo to a DS78V and drive to Thrown and Closed positions and
observe the turnout throw-bar moves as needed.
6.
In the Thrown or Closed position, using eye protection, carefully trim the
drive-wire tip just below the rail tops, so as not to catch on any rolling stock.
7.
With the drive-wire using the outermost horn arm hole, there will be about
+/- 0.25" of travel at a throw-bar offset of about 1" from the servo mount.
This will be fine for most HO and N scale turnouts and layout base material
depths. Any excess drive angle using the 0.6mm wire will provide com-
pliance and some spring tension on the rails. The heavier 0.8mm wire will
provide even more spring pressure, and not be required in most cases.
8.
Always ensure at extreme T/C angles that the horn arm does not bind to
make servo jam ON. This may damage servo and is not covered under war-
ranty.
These steps are some of many possible methods to install the DSXSV9, and user
skills will allow many variations of these broad steps.
3.0 Warranty & Repair
Digitrax gives a 90 day Warranty against material and manufacturing defects on
the DSXSV9. Visit www.digitrax.com for instructions for returning items for re-
pair. Please return warranty items directly to Digitrax - DO NOT return
items to place of purchase.
Digitrax, Inc. reserves the right to make changes in design and specifications, and/or to
make additions or improvements in its products without imposing any obligations upon
itself to install these changes, additions or improvements on products previously manufac-
tured. The newest features are documented on the product pages of the website.
Digitrax, Inc. is not responsible for unintentional errors or omissions in this document.
Need Support? helpdesk.digitrax.com
2443 Transmitter Road
Panama City, FL 32404
www.digitrax.com
© 2021 Digitrax, Inc.
center pivot hole,
1 of 4 mount slots for
for no drive offset
5/16" long screws
DSXSV9 Mount base-template
— 2 —
www.digitrax.com
