- ページ 5
ツール Clarke CFC100のPDF 取扱説明書をオンラインで閲覧またはダウンロードできます。Clarke CFC100 6 ページ。 Folding crane
Clarke CFC100 にも: 取扱説明書 (13 ページ)

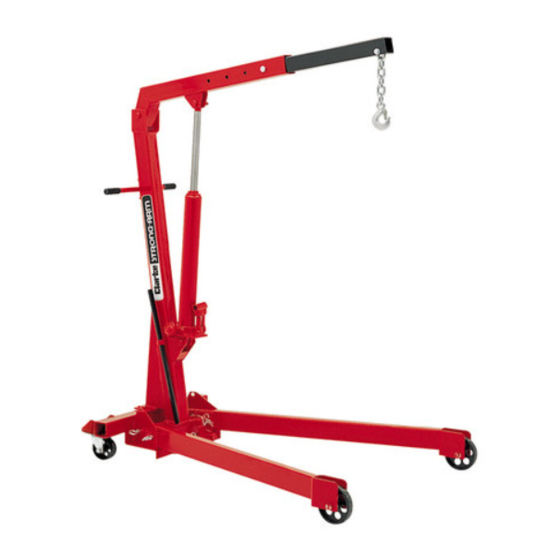
PARTS DIAGRAM
8
ASSEMBLY
NOTE:
a.
During assembly, unless otherwise stated, nuts and bolts should be finger
tight only. They should be fully tightened, once assembly is completed, in
the manner described below.
b.
All figures in brackets, refer to the parts list item numbers.
1.
Attach the two castors to the Base using the bolts supplied, tighten the
bolts securely.
2.
Insert the Left Hand Leg (3) into its housing in the base, line up the holes
and insert the pin (12), securing in place with the 'R' clip (13). Repeat the
procedure for the Right Hand Leg (4).
NOTE:
The leg ends should be parallel when legs are correctly assembled.
3.
Attach the Main Column (1) to the base using the five nuts, bolts and
washers provided.
4.
With assistance, lift the Ram assembly and enter the lower mounting into
its housing on the main support. Locate it using the Bolt (17), and secure
the bolt with washer (16) and nut (28). Rest the ram against the main
column.
5.
With assistance, raise the jib (5) and slide it into position on top of the
main column, locate it using the bolt (15), and secure the bolt with washer
(16) and nut (28).
6.
Lower the jib and position the ram so that its upper end slides into the housing
on the jib. Line up the holes and locate it using the bolt (21), secure the bolt
with washer (16) and nut (28).
NOTE:
It may be necessary to extend the ram slightly in order for the holes to line up. See
'Operation' for details of how to achieve this.
7.
Insert the jib extension (6) into the end of the jib and secure in one of the
four positions using the Lock Pin and 'R' Clip (71).
8.
Attach the hook and chain assembly (24) to the end of the jib extension
using bolt (23) secure with washer (68) and nut (25). Tighten securely.
9.
Bolt the Handle (14) onto the main column using the four bolts (20) with
washers (19) and tighten securely.
10.
Rock the assembly to ensure that no part is under stress, then tighten all
nuts and bolts, ensuring they are completely secure.
11.
To fold the legs, for storage purposes, first manoeuvre the crane to its storage
location, then lower the stabilising foot and secure with bolt (10) and nut
(11).
12.
Remove the 'R' clips from the leg locking pins then remove the locking
pins. Lift each leg to the vertical position, securing in place, again using the
locking pins. Replace the 'R' clips.
5
