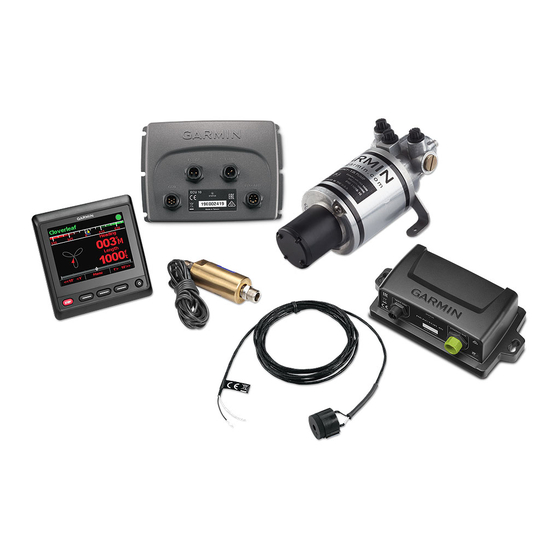
Garmin Reactor 40 설치 지침 매뉴얼 - 페이지 6
{카테고리_이름} Garmin Reactor 40에 대한 설치 지침 매뉴얼을 온라인으로 검색하거나 PDF를 다운로드하세요. Garmin Reactor 40 13 페이지. Mechanical
Garmin Reactor 40에 대해서도 마찬가지입니다: 설치 지침 매뉴얼 (11 페이지), 설치 지침 매뉴얼 (29 페이지), 구성 매뉴얼 (8 페이지), 설치 지침 매뉴얼 (25 페이지)

+
‐
Item Description
Solenoid power cable
Starboard solenoid
Port solenoid
Bypass solenoid
Auxiliary steering system May not be present in all systems.
Wire Color
Description
Red
Connect to starboard solenoid positive (+).
White/red
Connect to starboard common (-).
Black
Connect to port solenoid positive (+).
White/black Connect to port common (-).
Blue
Connect to bypass solenoid positive (+).
Cut and tape this wire if no bypass solenoid is
present.
White/blue Connect to bypass solenoid common (-).
Cut and tape this wire if no bypass solenoid is
present.
N/A
Auxiliary steering starboard positive (+) (if
present).
N/A
Auxiliary steering port positive (+) (if present).
N/A
Auxiliary steering bypass positive (+) (if present).
N/A
Auxiliary steering common (-) (if present).
5
Connect the solenoid power cable to the ECU.
Installing a Garmin Rudder Feedback Sensor
If you installed a drive unit provided by Garmin, rudder feedback
data is provided by the drive unit, and a separate rudder
feedback sensor is not required. If you are connecting the
autopilot to a drive unit not sold by Garmin, you must also install
a rudder feedback sensor, such as the GRF 10 (sold
separately).
Follow the installation instructions provided with your GRF
rudder feedback sensor to connect it to your rudder control
and autopilot system.
Connecting to an Existing Rudder Feedback Sensor
If you connected the autopilot to a drive unit not sold by Garmin,
and you plan to connect to a rudder feedback sensor not sold by
Garmin, you must use a rudder feedback cable to connect your
sensor to the Reactor 40 Mechanical autopilot. This cable is sold
separately.
NOTE: The Reactor 40 Mechanical autopilot is compatible with
a typical three-terminal, potentiometer-type rudder feedback
6
+
‐
+
‐
Notes
Sold separately.
May not be present in all systems.
sensor only. The system does not work with a frequency-based
rudder feedback sensor.
1
If necessary, use the installation instructions provided with
the rudder feedback sensor to install it on your boat.
2
If your rudder feedback sensor has cables connected,
disconnect the cables.
3
Consult the documentation provided by the manufacturer of
your rudder feedback sensor to identify the connections on
your rudder feedback sensor.
4
Connect the rudder feedback cable (not included) to your
drive unit, based on the wire colors and functions in the table.
If necessary, the cable can be extended using 22 AWG
2
(0.33 mm
) wire.
Wire Color
Function
Red
Rudder feedback positive (+)
Black
Rudder feedback negative (-)
Yellow
Rudder feedback wiper
5
Connect the rudder feedback cable to the ECU.
Connecting the CCU
1
Route the connector end of the CCU cable to the ECU and
make the connection.
2
Route the orange and blue wires from the bare-wire portion
of the CCU cable to the location where you plan to install the
alarm
(Installing the Alarm, page
If the cable is not long enough, extend the appropriate wires
2
with 0.08 mm
(28 AWG) wire.
3
Route the brown and black wires from the bare-wire portion
of the CCU cable to the location where you plan to install the
Shadow Drive sensor
(Installing the Shadow Drive Sensor,
page
6) (optional).
If the cable is not long enough, extend the appropriate wires
2
with 0.08 mm
(28 AWG) wire.
If you do not plan to install the Shadow Drive sensor, cut and
tape the brown and black wires.
Installing the Shadow Drive Sensor
NOTE: The Shadow Drive sensor is an optional accessory that
can be used only on a boat with a hydraulic steering system.
Connecting the Shadow Drive Sensor to the Hydraulic
System
Before you can install the Shadow Drive sensor, you must select
a location at which to connect the Shadow Drive sensor to the
hydraulic steering of your boat
Considerations, page
3).
Use hydraulic connectors (not included) to install the Shadow
Drive sensor in the appropriate hydraulic line.
Connecting the Shadow Drive Sensor to the CCU
1
Route the bare-wire end of the CCU cable to the Shadow
Drive sensor.
If the cable is not long enough, extend the appropriate wires
using 28 AWG (0.08 mm²) wire.
2
Connect the cables, based on this table.
Shadow Drive Sensor Wire Color
Red (+)
Black (-)
3
Solder and cover all bare-wire connections.
Installing the Alarm
Before you can mount the alarm, you must select a mounting
location
(Alarm Mounting and Connection Considerations,
page
4).
1
Route the alarm cable to the bare-wire end of the CCU cable.
6).
(Shadow Drive Sensor Mounting
CCU Cable Wire Color
Brown (+)
Black (-)
