Olympus U-DA 사용 설명서 - 페이지 7
{카테고리_이름} Olympus U-DA에 대한 사용 설명서을 온라인으로 검색하거나 PDF를 다운로드하세요. Olympus U-DA 12 페이지. Drawing attachment
ASSEMBLY
2-1 Mounting the Drawing Attachment on the Microscope
@
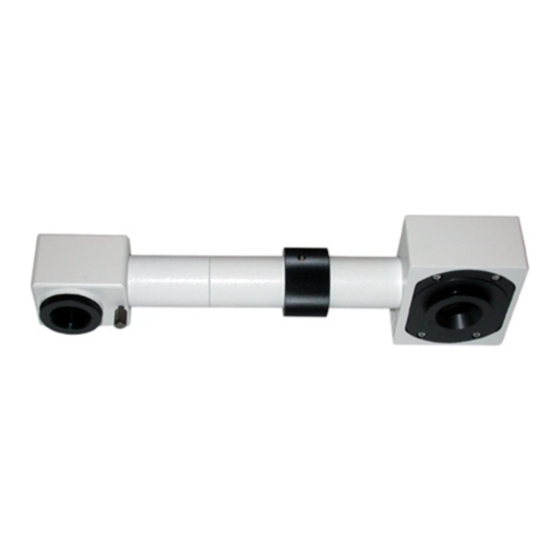
Fig. 1
...
³
|
²
Fig. 2
2-2 Mounting the Observation Tube
@
Fig. 3
When only the U-DA is mounted on the
1
microscope frame
1. Using the Allen screwdriver provided with the microscope frame, fully
loosen the clamping screw @ on the microscope frame.
2. Insert the circular dovetail mount at the bottom of the drawing attachment
into the mount on the microscope frame.
3. Rotate the dovetail so the drawing attachment's mirror housing is point-
ing either to the left or right side when looking at the microscope from the
front. (Fig. 1 shows the right-hand installation.)
4. Using the Allen screwdriver, fully tighten the clamping screw @.
# The lens adapter frame (ƒ in Fig. 2) should not be used as it will
cause vignetting of the sketched image.
When the U-DA is mounted above another
2
intermediate tube
1. Fully loosen the mirror housing clamping knob ² and detach the mirror
housing.
2. Remove the drawing lens | screwed into the adapter tube ³.
3. Unscrew and remove the adapter tube ³.
# The removed adapter tube ³ is not used in this mounting procedure.
4. Screw the lens adapter frame ƒ, provided with the U-DA, into the threaded
ƒ |
hole at the bottom of the mirror housing.
5. Screw the drawing lens | removed in step 2 above, into the lens adapter
frame ƒ.
6. Attach the drawing attachment on the existing intermediate tube.
7. Insert the mirror housing into the relay tube ... and tighten the mirror
housing clamping knob ².
1. Using the Allen screwdriver, fully loosen the clamping screw @ of the
drawing attachment (or another intermediate tube).
2. Insert the circular dovetail mount at the observation tube into the mount
on the drawing attachment.
3. Using the Allen screwdriver, securely tighten the clamping screw @ again.
U-DA
(Fig. 1)
(Fig. 2)
(Fig. 3)
2