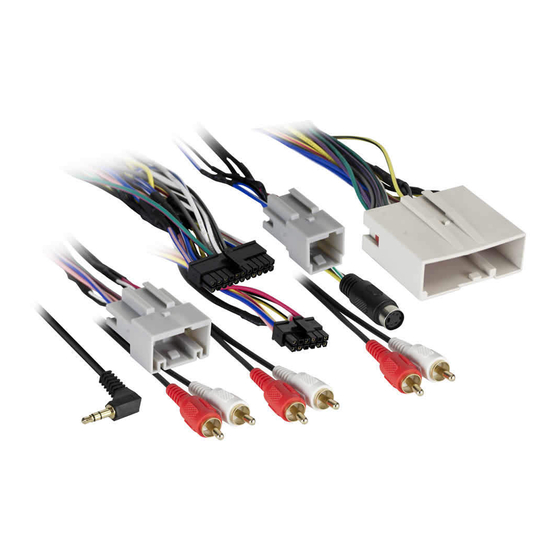
Axxess AX-ADFD01 설치 지침 매뉴얼 - 페이지 5
{카테고리_이름} Axxess AX-ADFD01에 대한 설치 지침 매뉴얼을 온라인으로 검색하거나 PDF를 다운로드하세요. Axxess AX-ADFD01 16 페이지. Data interface for ford

CONNECTIONS TO BE MADE
• If the vehicle is equipped without SYNC, and the AUX-IN jack is desired to be retained,
connect the Red and White RCA jacks labeled "FROM 3.5" to the audio AUX-IN jacks.
• The DIN jack is to be used with the optional AX-LCD (sold separately) to retain SYNC
information.
• Connect the Red wire to accessory power.
• Connect the White RCA jack labeled "SUBWOOFER" to the subwoofer out jack.
• Connect the Red RCA jack labeled "CENTER CHANNEL" to the center channel out jack on the
radio/processor.
Note: If this jack is not present on the aftermarket radio, just leave be. Only the center
channel speaker will be lost.
• Tape off and disregard the following (4) wires, they will not be used in this application:
Green, Green/Black, Purple, Purple/Black
12-pin pre-wired ASWC-1 harness:
This harness is to be used along with the optional ASWC-1 (sold separately) to retain steering
wheel audio controls. If the ASWC-1 is not being used, disregard this harness. If the ASWC-1
will be used, please refer to the ASWC-1 instructions for radio connections and programming.
Disregard the harness that comes with the ASWC-1.
DIN jack:
The DIN jack is to be used with the optional AX-LCD (sold separately) to retain satellite radio or
SYNC information.
Continue to Installing & Programming the AX-ADFD01
(CONT.)
Attention! The AX-ADFD01 will work with both the AX-ADBOX1 and AX-ADBOX2 interfaces,
but programming will be different. Refer to the proper page for whichever interface is being
used. Also note, the programming instructions for the AX-ADBOX2 reflect gen. 2. If installing a
gen. 1 AX-ADBOX2, refer to the AX-ADBOX1 programming instructions. Gen. 2 interfaces can be
distinguished by a blue reset button between the (2) connectors.
AX-ADBOX1
Installing the AX-ADFD01
With the key in the off position:
• Connect the 16-pin harness with stripped leads, and the AX-ADFD01 harness, into the interface.
• Connect the AX-ADFD01 harness to the wiring harness in the vehicle.
• If an ASWC-1 (sold separately) will be used, do not connect it until the AX-ADFD01 is
programmed and fully functional.
Programming the AX-ADFD01
Attention! If the interface ever loses power, the following steps will need to be performed
again. Please ensure that the owner of the vehicle knows this.
•
Turn the key (or push-to-start button) to the ignition position and wait until the radio comes on
Note: If the radio doesn't not come on within 60 seconds, turn the key to the off position,
disconnect the interface, check all connections, reconnect the interface, and then try again.
• Turn the key (or push-to-start button) to the off position, then to the accessory position.
Test all functions of the installation for proper operation, before reassembling the dash.
Continue to Adjusting the AX-ADFD01
INSTALLING & PROGRAMMING
THE AX-ADFD01
REV. 6/26/2018 INSTAX-ADFD01
.
5
