Blueridge Digi-Touch DDN-SW1 설치 매뉴얼 - 페이지 6
{카테고리_이름} Blueridge Digi-Touch DDN-SW1에 대한 설치 매뉴얼을 온라인으로 검색하거나 PDF를 다운로드하세요. Blueridge Digi-Touch DDN-SW1 13 페이지.
B l u e
R i d g e
T e c h n o l o g i e s
Installation Steps
Step 1 - Physical Dimensions & Dip Switch Settings (DDN-SW1)
a. Ensure proper size gang box and Decora plate for DDN-SW1.
b. If exact settings per each location have not been pre-set, set the correct dip switch address on
each module (see look-up table, Appendix A). It is helpful to use a worksheet to layout all the
switch numbers for each panel before setting addresses on the switches.
c. For SW1, set the address using the dip switches under the Decora style plate. It is not neces-
sary to remove the entire switch. Use the Appendix A table to get the binary dipswitch setting
for the decimal lighting group number
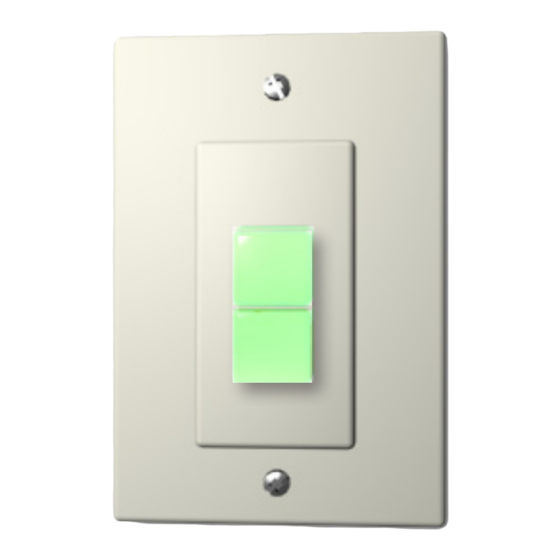
d. See example below for DDN-SW1 (1-button). Dip switch is "5" in binary. Thus the single button
controls panel group 5. The "group" refers to group assignments made in the Blue Ridge Tech-
nologies panel via Lighting Panel Programmer's Kit (LPPK).
Dip Switch Value
Dip Switch Number
1
2
3
4
5
6
7
8
Dip Switch Detail
e. If you are also responsible for programming the lighting panels, see section entitled "LPPK
Setup for Blue Ridge Technologies Digi-Touch Switches", Appendix B in this publication.
w w w. b r t i n t. c o m
Blue Ridge Technologies is a Trademark of Blue Ridge Technologies
© 2010 Blue Ridge Technologies International, LLC All Rights Reserved.
ON
(1)
(2)
(4)
(8)
(16)
(32)
(64)
(128)
OFF
Installation Guide
Step 1-d
5
J3
(Front View)
DDN-SW1
8 0 0 - 2 4 1 - 9 1 7 3
Digi-Touch
DDN-SW1
R
LEDs
Y
G
1.75"
Push-Button is
assigned 5 per dip
switch setting
1.50"
Digi-Touch_IG.pdf
page 6
062310