FOLLO FUTURA STABILIS 104-206-11 Handmatig - Pagina 7
Blader online of download pdf Handmatig voor {categorie_naam} FOLLO FUTURA STABILIS 104-206-11. FOLLO FUTURA STABILIS 104-206-11 13 pagina's. Arm trainer
The purpose of the training
The arm training machine is designed to improve circulation. It can be used
standing on a table or on the floor or it can be attached to wall bars. Select a
resistance that the patient can keep up for at least 15 minutes. Rotate using even
movements. Movements should be extended as far as possilble. Read off time and
distance on the counter.
Safety information
Make sure that nothing can be pinched or jammed and that the handles rotate
easily and are properly secured.
Always test the machine's functions yourself and allow the patient to test all
functions under supervision before handing out the product for self-training.
Unpacking/assembly
Take care when removing the
machine from its packaging. Do NOT
use a knife or other sharp instrument
as this may damage the machine.
Inspect the machine for any transport
damage.
Place the machine on the floor as
shown in the drawing. Remove screw
(A). Stand on the frame (B) and lift up the main
beam (C) until the angled supporting rod (D)
lines up with its attachment point. Replace
screw (A). Place two washers between the
supporting rod and the attachment point. Do
not use a washer on the outside of the
supporting rod (see drawing).
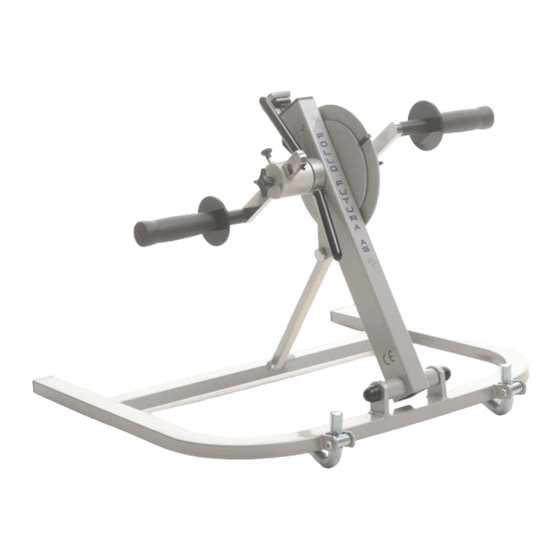
Guidelines for use
1.The arm trainer machine is designed for use standing on a table or attached to
wall bars. The person using the machine may sit or stand in front of the machine.
Make sure the machine is properly attached to the wall bars or table and is steady.
2. Adjusting resistance: Adjust resistance using
the levers (1). Rotating the levers in a clockwise
direction increases reistance, and loosening anti-
clockwise reduces resistance.
3. Adjusting the
handles: The crank throw of the handles may be
adjusted by first loosening the knob (2). Pull out
the lockpin (3) and push or pull the handle to the
required position. Make sure that the lockpin (3)
lines up with a hole and replace the lockpin.
Tighten the knob (2).
4. Counter: The counter (5) is a bicycle computer. It registers
when training starts, and is switched on automatically (at the
same function as when it was last used). Use the button (6)
on the bicylcle computer to switch between the different
functions: Distance, time, speed, clock and auto (changes
regularly between all functions). Holding down button (6) will
clear time and distance (not the clock). The computer will
switch off automatically when not in use for a period. Read
more about the bicycle computer's functions in the separate
instructions for use.
08/08/18
Side 7
Rev: 12