Diamond Tech Studio Pro Precision 2000 Manual de operação - Página 4
Procurar online ou descarregar pdf Manual de operação para Serra Diamond Tech Studio Pro Precision 2000. Diamond Tech Studio Pro Precision 2000 8 páginas.

C. Water Systems
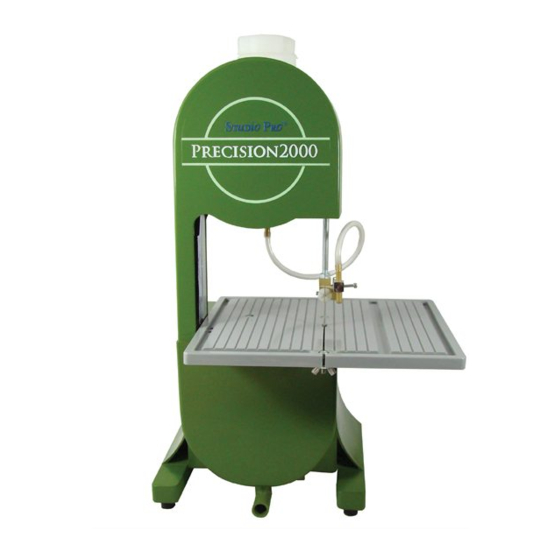
The PRECISION 2000™ comes equipped with brass water supply nozzle and large capacity water bottle, offering better
water fl ow to the front of the blade for increased cooling and lubrication.
1) Remove water bottle cap and fi ll with approximately 24 oz. of water. Replace cap but do not screw lid on
tightly. A moderately loose lid will prevent a vacuum from occurring.
2) When ready to cut, open water valve on the bottom of the bottle by pushing the lever downward (Fig.7). Water
should begin to fl ow freely from the water nozzle mounted on the blade guide assembly. Water nozzle is factory set
to fl ow on the front of the blade. However, some movement may have occurred during shipment. To adjust position
of the nozzle, loosen the hex screw on the side of the blade guide assembly (Fig.8) and adjust the brass nozzle into
proper position so the water fl ows to the front of the blade, retighten screw.
3) The water should drain off the work surface, through the 2 holes on the left side of the table, draining into the
lower wheel cover which acts as a reservoir.
4) The PRECISION 2000™ is equipped with a large drainage spout at the base of the saw (Fig.9). Connect tubing to
this spout and secure with locking clip. Place the open end of tube into a collection tray, bucket or sink.
WARNING: When using a Diamond Blade, never operate saw if there is insuffi cient water at the point of cutting, as this
will cause damage to the blade.
Fig.7
A. Blade Guide Adjustment
The PRECISION 2000™ comes with lower and upper blade guides. Correct alignment of these guides is essential to
proper glass cutting and extending blade life.
1) The blade should pass through the grooves of the upper and lower blade guides with the back edge of the blade
resting slightly inside the grooves. To adjust, use a small hex wrench and loosen the set screw located on the
right side of the lower (Fig.10) or upper blade guide assembly (Fig.11). Slide the blade guide back or forward to
achieve proper positioning. The blade should pass vertically through the guides when viewed from the side. The
PRECISION 2000™ blade guides can be rotated 3 times for extended guide wear.
NOTE: Blade guides should be inspected and adjusted after approximately 3 hours of use. Frequent replacement
of blade guides is recommended to maintain cutting accuracy and extend blade life.
B. Use of Miter Gauge for straight edge or angle cuts
1) Set guide at the desired angle by loosening thumb screw and rotating position mark on the silver bar to
desired angle.
2) Tighten screw to secure setting. Place angle guide into the channel on the work surface.
3) Place material against the straight edge guide and feed the material slowly into the blade (Fig.12) pushing back to the
guide. The band saw is designed for intricate radius cutting; however the miter gauge will permit straight edge cutting
when needed.
C. Blade Tracking
Each PRECISION 2000™ is fully tested and adjusted before it is shipped. Occasionally, additional tracking adjustments
are necessary due to movement in shipping. Ideally the blade should be positioned 1/8" - 1/16" (3.75 - 1.66 mm) from
the back wall of the upper wheel.
*Excess tubing can be cut and removed using household scissors.
Fig.8
USE AND MAINTENANCE
Fig.9
