Advanced Radio Smart Switch Hızlı Başlangıç Kılavuzu - Sayfa 10
Kontrol Paneli Advanced Radio Smart Switch için çevrimiçi göz atın veya pdf Hızlı Başlangıç Kılavuzu indirin. Advanced Radio Smart Switch 15 sayfaları.

Step 4
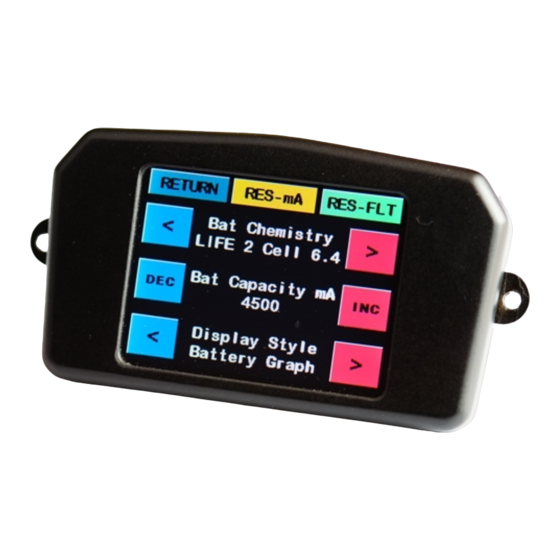
This is the battery setup screen. Using the arrows
(<, >)next to Bat Chemistry cycle through until you
see the chemistry you are using with the switch.
The Smart Switch works with both 2S (6.0V—8.4v)
and 3S (10.8—12.8V) packs The Options are Lipo,
Li-ion, Life, NiCd, NiMH.
Note: When setting the chemistry, ensure you
select the correct voltage and chemistry, other-
wise you will get a false low voltage warning (see
page 11).
Step 5
+
Using the
and
capacity shown on your battery packs.
Note: Step 5 is extremely important, Please en-
sure the capacity is set correctly to the battery
packs you are using.
Step 6
Once you have set these up, press the RETURN
button to take you back to the main menu. Press
RETURN again to go back to the Smart Screen.
You have successfully setup the Smart Switch.
Important
The Smart display shows how much capacity you have left using the battery indicators on
the left and right of the battery screen It is important that the capacity you enter is correct
and accurate. If you are unsure about the capacity of your batteries or if your packs are not
new. We recommend cycling your packs by discharging them and recharging them to full.
This will give you the best possible result for the battery packs you are using.
10
-
buttons, set the capacity to the
