Caroma Invisi Series II Посібник з монтажу - Сторінка 11
Переглянути онлайн або завантажити pdf Посібник з монтажу для Туалети Caroma Invisi Series II. Caroma Invisi Series II 20 сторінок. Urinal concealed cistern
Також для Caroma Invisi Series II: Посібник (16 сторінок)
Induct Access
1.
Calculate the finished floor height
(allowing for floor gradings and tile
thickness, etc.) and add this to the
known height of the selected urinal's
inlet. Mark this resulting height on
This is your datum
the stud -
and flush pipe centre line.
2.
Fabricate flush pipe using the
Copper Adaptor provided.
3.
Drill suitable diameter hole(s)
through the wall for the flush pipe(s).
4.
Lubricate 'O'Ring on cistern tail
using soapy water and slide flush
pipe on so that it is protruding in the
opposite direction from that of the
Service Access Box.
NOTE: For service duct
access install cistern backwards
with flush pipe rotated 180° and
utilising the Remote Mounting Box
for button installation.
5.
Place the flush pipe through hole
and secure cistern to duct wall using 2
screws via holes provided in each of the
mounting brackets.
Service Access Box
Front Mount
Service Access Box
Centre Line
(standard mounting)
335mm
to
access panel
centre line
Refer to
specifications
of the selected
urinal.
Datum
Datum
400mm – 420mm
45mm
- Water Supply Connection
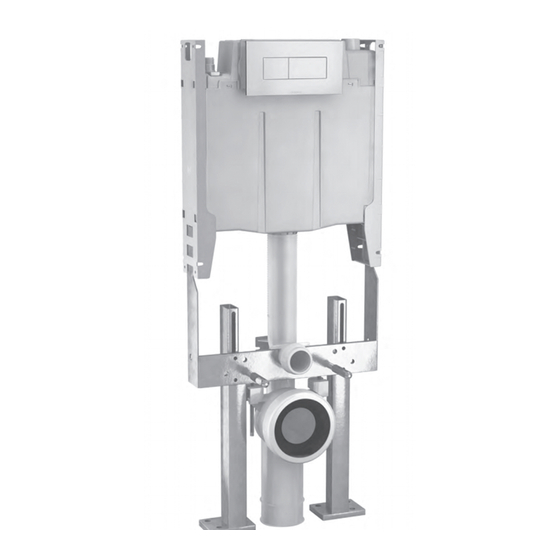
Installing the Cistern -
6.
Connect the water supply.
Water Supply Connection
7.
Remove Dust Cover, turn Isolating
Tap ON, fill tank & set water level using
Adjusting Screw on the inlet valve.
ON
OFF
Dust Cover
8.
Check cistern and all joints for leaks.
9.
Turn Isolating Tap OFF. Continue
with Preparation for Fitout on page 15.
237 002