Siemens SIPART PS2 설치 지침 - 페이지 9
{카테고리_이름} Siemens SIPART PS2에 대한 설치 지침을 온라인으로 검색하거나 PDF를 다운로드하세요. Siemens SIPART PS2 11 페이지. Mounting bracket kit
Siemens SIPART PS2에 대해서도 마찬가지입니다: 설치 지침 (4 페이지), 사용 설명서 (28 페이지), 설치 지침 (4 페이지), 하드웨어 설치 매뉴얼 (30 페이지), 기술 설명 (26 페이지), 간결한 사용 설명서 (35 페이지), 키트 설치 지침 (9 페이지)
7. If "NOINI" is flashing on display, skip to step 12, otherwise go to step 8.
8. Press and hold [HAND] button to enter configuration mode. When display changes, release
button. See Figure 6.
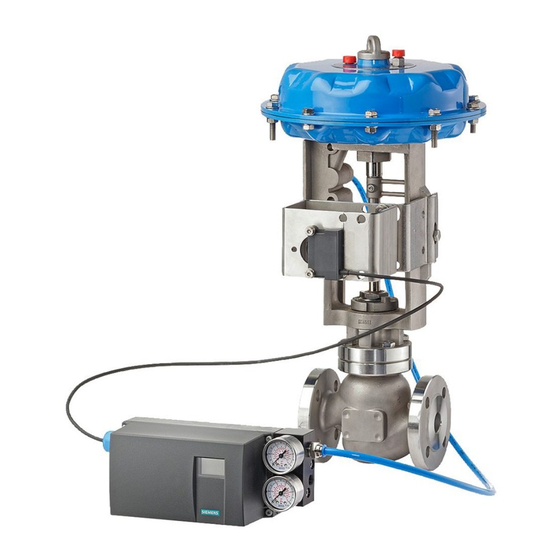
Slip Clutch
Thumbwheel
9. Press and release [HAND] button until parameter 4 is displayed in lower left corner of display.
10. Press and hold [-] minus button until "no" appears on display.
11. Press and hold [HAND] button to exit configuration mode. When display changes, release button.
12. Using [+] plus and/or [-] minus buttons move valve throughout valve travel. While moving the valve
with the pushbuttons, ensure that:
The feedback linkage moves throughout the entire movement of a full stroke of the valve.
Adjust as needed.
The feedback pin moves freely within the feedback lever for the entire valve travel.
All hardware is tightened securely.
Note: To move quickly in one direction press and hold [+] plus button, then [-] minus button. To
move quickly in the opposite direction reverse button sequence.
13. Use a [+] or [-] button to move the valve to a position away from an end-stop (mid-travel is best).
Verify that the valve remains at that position once buttons are released; if it moves check for air
leaks.
FIGURE 6 PS2 Configuration Mode Display (sample)
Hand
Button
FIGURE 7 Set-up Buttons (PS2 Cover Removed)
(Minus)
+ (Plus)
Button
Button
9
15900-795
Transmission gear
ratio switch set to 33